Author Archives: Owen

New Website!

It’s been a long time since I’ve posted here, and unfortunately this will be my last post on this blog. However, I’ve got a new website! https://owens-tech.xyz/. Its updated for new projects that I’ve been working on, like my YouTube channel, and I’m hosting it myself so I have no limits on what I can do with it.

Not much is posted there yet, but that will change soon. The new website will act as an extension of my YouTube channel. It’s quicker to write a blog post than to film and edit a video!

See you there!

-Owen

(P.S. for family members: please remember that everything I post is public, so don’t comment anything you don’t want anybody on the internet to see)

Developing Black and White Film

This one is long, so you have been warned.

A little over a month ago, I purchased equipment and chemicals and started developing my own B&W film. I did a bunch of research beforehand, and let me tell you, information on film developing is a huge jumbled mess of articles and videos. No one can really give you the same information. When I first started developing, I found two main things:

  1.  Developing B&W is pretty easy and not as delicate as people make it seem.
  2.  When you get the hang of it, you develop (haha) your own way of doing it, and it will be different from everyone’s own way.

Here’s what I use (linked to product):

Temperature and time are important for developing, and so I use this website to find developing times and calculate temperatures.

The developer is what makes the image appear on the film and fixer removes the light-sensitivity from it.  Photo-Flo isn’t necessary for the actual developing process, but I highly recommend it as a final rinse for the film because it prevents water stains from forming on the negative. Hypo Check also isn’t required, but it is useful because it allows you to test if your fixer is still good, as it can be reused many times. You just put two drops in the fixer and if a white cloud forms the fixer is exhausted. You can also reuse the developer a bit, but I recommend only reusing it up to 3 times, or you will get poor results (developer is super cheap anyway).

Developing the Film:

The process for developing is pretty simple. You first need to load the film from the cartridge into your developing tank in COMPLETE DARKNESS (you don’t need a darkroom to do this, you can just get a film changing bag and do it in your living room). This is the hardest part of the developing process and requires practice. Find some really expired film to sacrifice and practice loading in daylight.

Then you need to presoak the film in soft tap or distilled water that is the same temperature as all of your chemicals to clean it of fingerprints and dust and to soften the emulsion for developing. Agitate it a bit and pour it down the drain.

Then add the developer. The developing times depend entirely on the temperature of the chemicals, the type of film, and the dilution of your developer (I always use it undiluted because it lasts longer and develops faster). After you add it, start your timer and agitate it for 5 seconds every 30 seconds for the time you calculated. Tap the tank on a hard surface twice after to remove air bubbles. When I say agitate, I don’t mean shake it like an extra pulp container of orange juice with all the pulp at the bottom, because that causes air bubbles and that will mess up your film. All you need to do is gently twirl the tank just so a little whirlpool forms inside. After this is done, pour it out into a bottle either to be used again or to be disposed of properly.

Then you rinse the developer off the film with the same room temperature water 3 times. This is called the stop bath, and while there is a special chemical for this, it isn’t necessary and is really just a waste of money.

Then you add fixer. You can’t just look up “fixer times” online and get a good result, because fixer doesn’t affect the actual image, so everyone figures it out their own way. The key to fixer is getting the sweet spot (a very wide range). If you under fix, your film might still be light sensitive when you take it out, or it will have milky white streaks running down the whole negative. I’ve had this happen two times, and you can usually fix it by putting it back in the fixer for a couple more minutes. If you over fix, you can physically damage the negative (fixer is pretty toxic stuff). It depends on the fixer, but you would have to leave the film in it for like 20 minutes to actually cause damage. You will have to test it for yourself, but I’ve had great success with a fix time between 5-6 minutes with the same agitations as the developer. I usually fix for 5 minutes and 40 seconds.

Then you are almost done! At this point, your negatives are no longer light sensitive so you can take them out if you like. Just rinse them once with water, and then add water and a drop of Photo-Flo. Agitate a bit, then pour it out and hang the negatives to dry.

A few notes:

  1. If you live in an area with hard tap water, you have to use distilled water for everything. If you have soft tap water, you can use it for rinsing, but use distilled water for mixing your chemicals.
  2. If you’re still confused about something, please leave a comment!


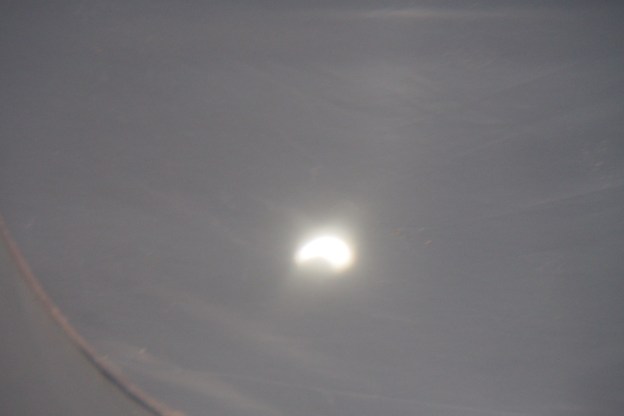
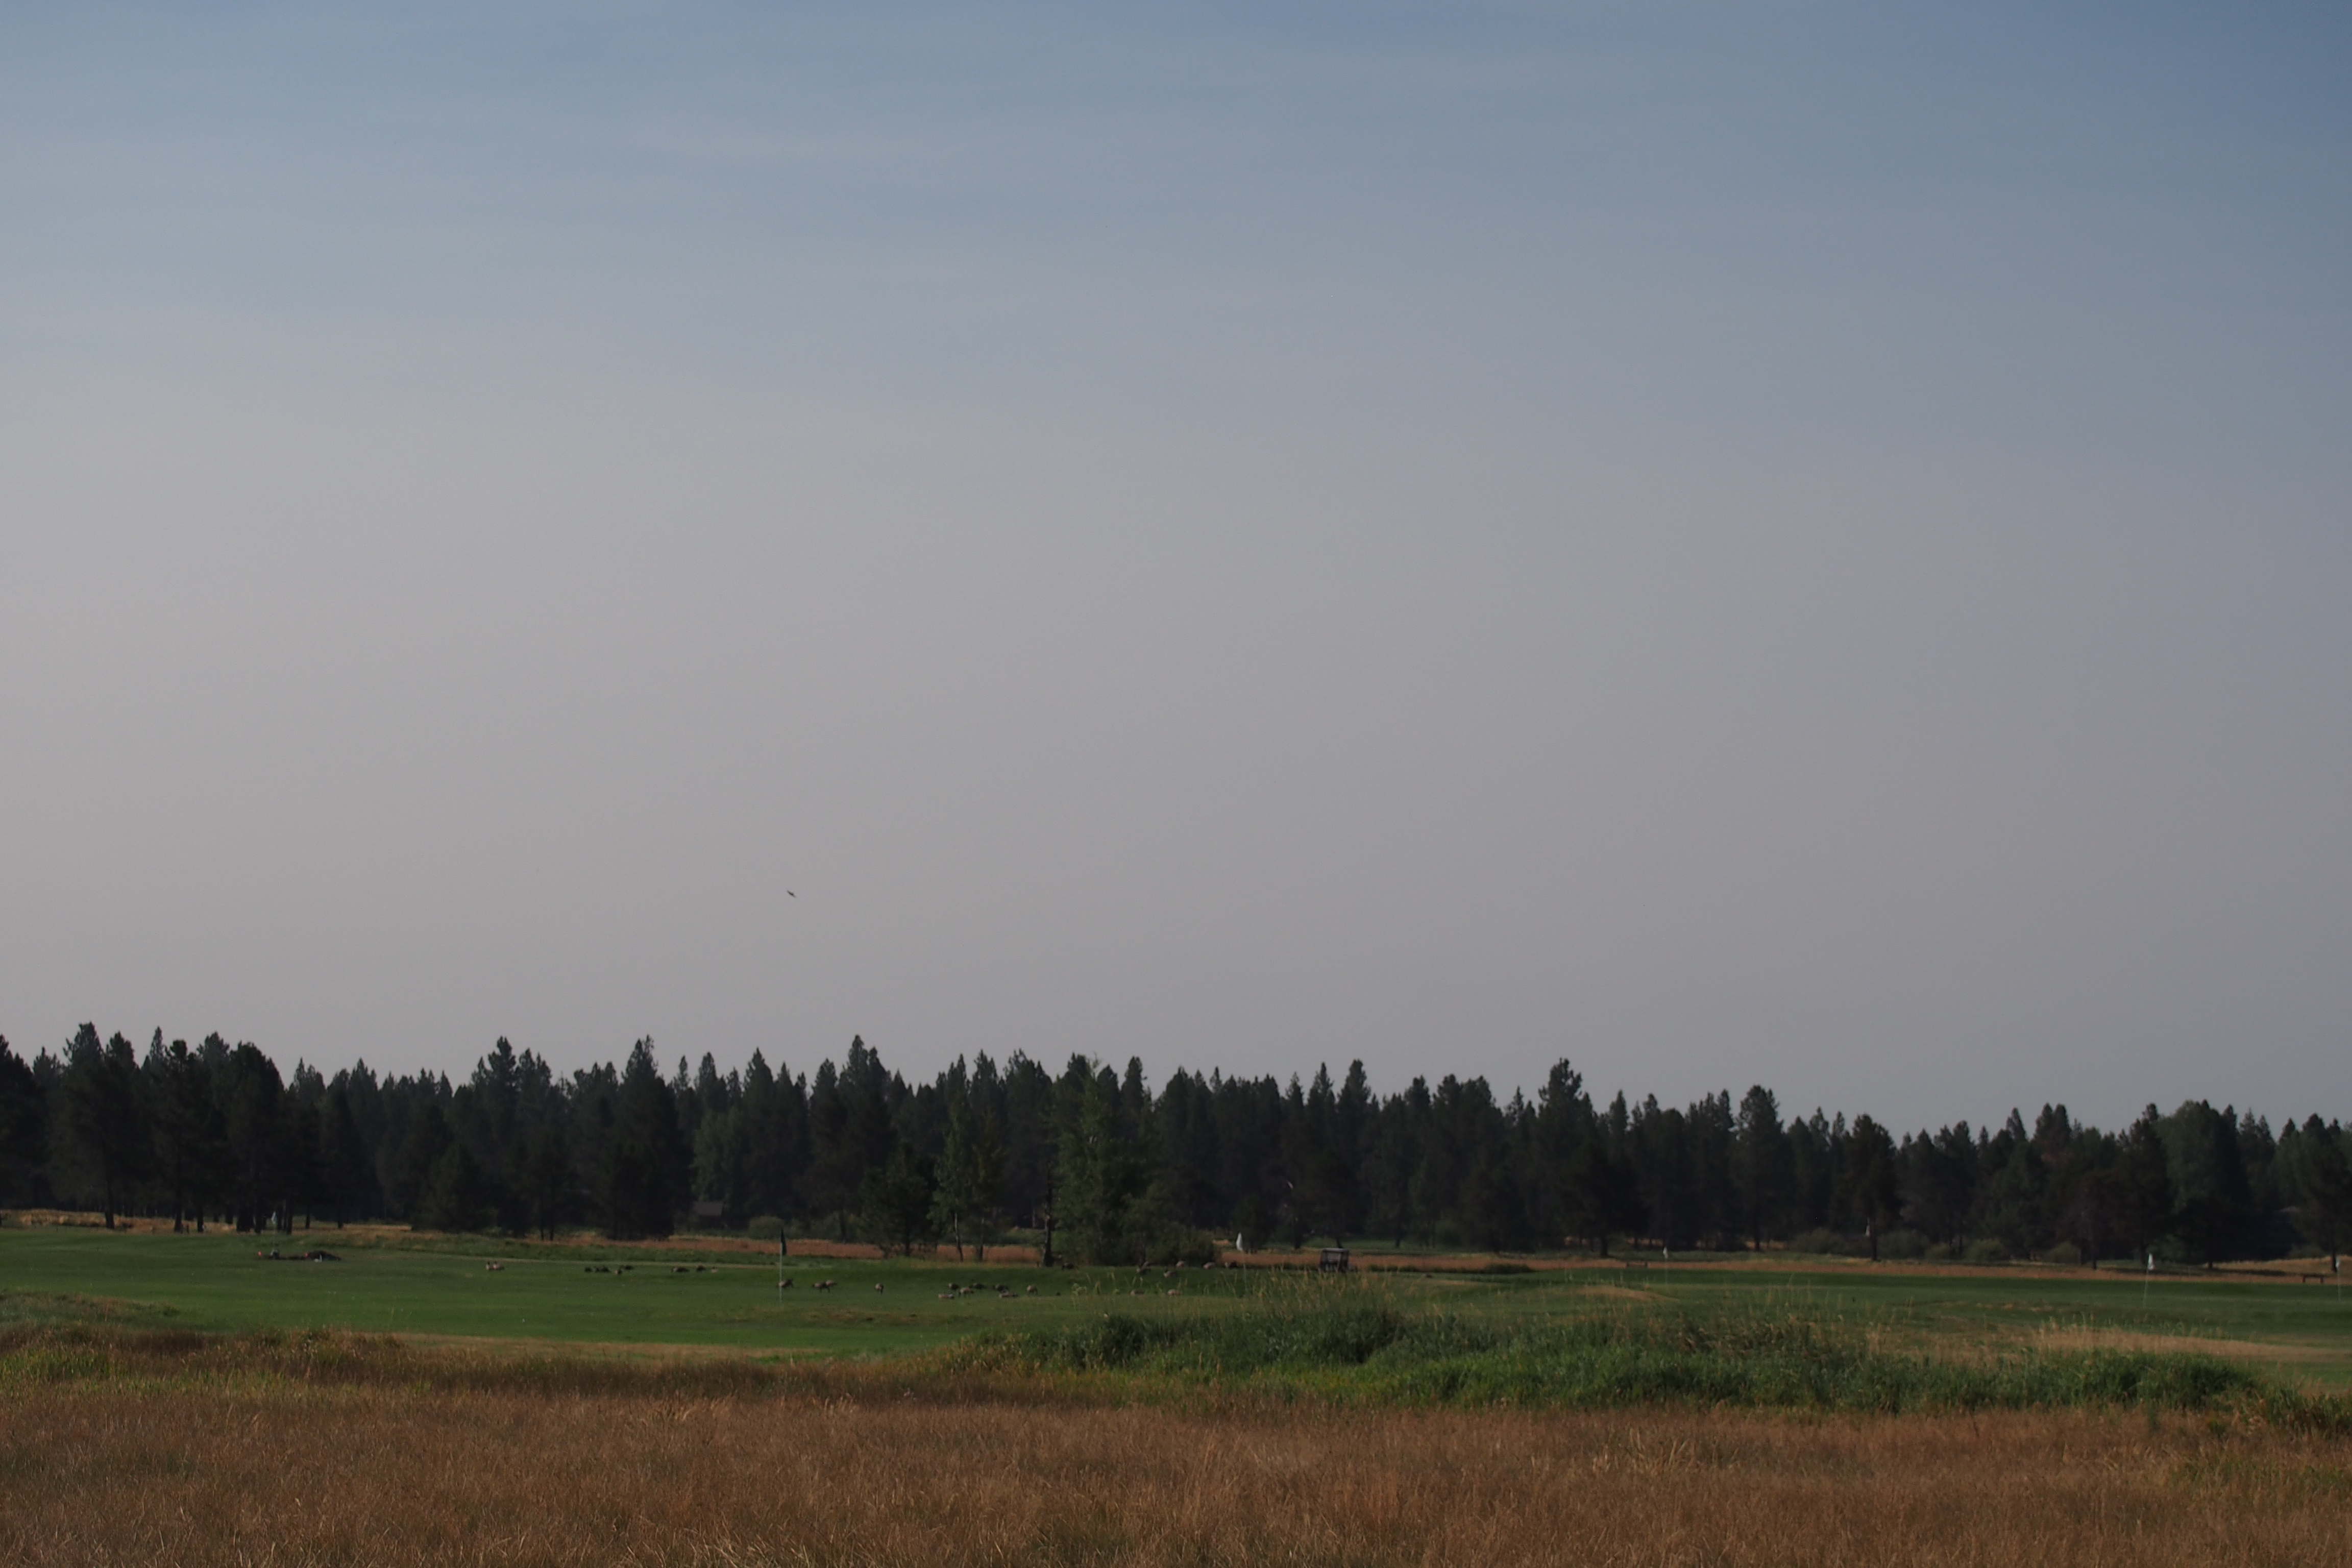
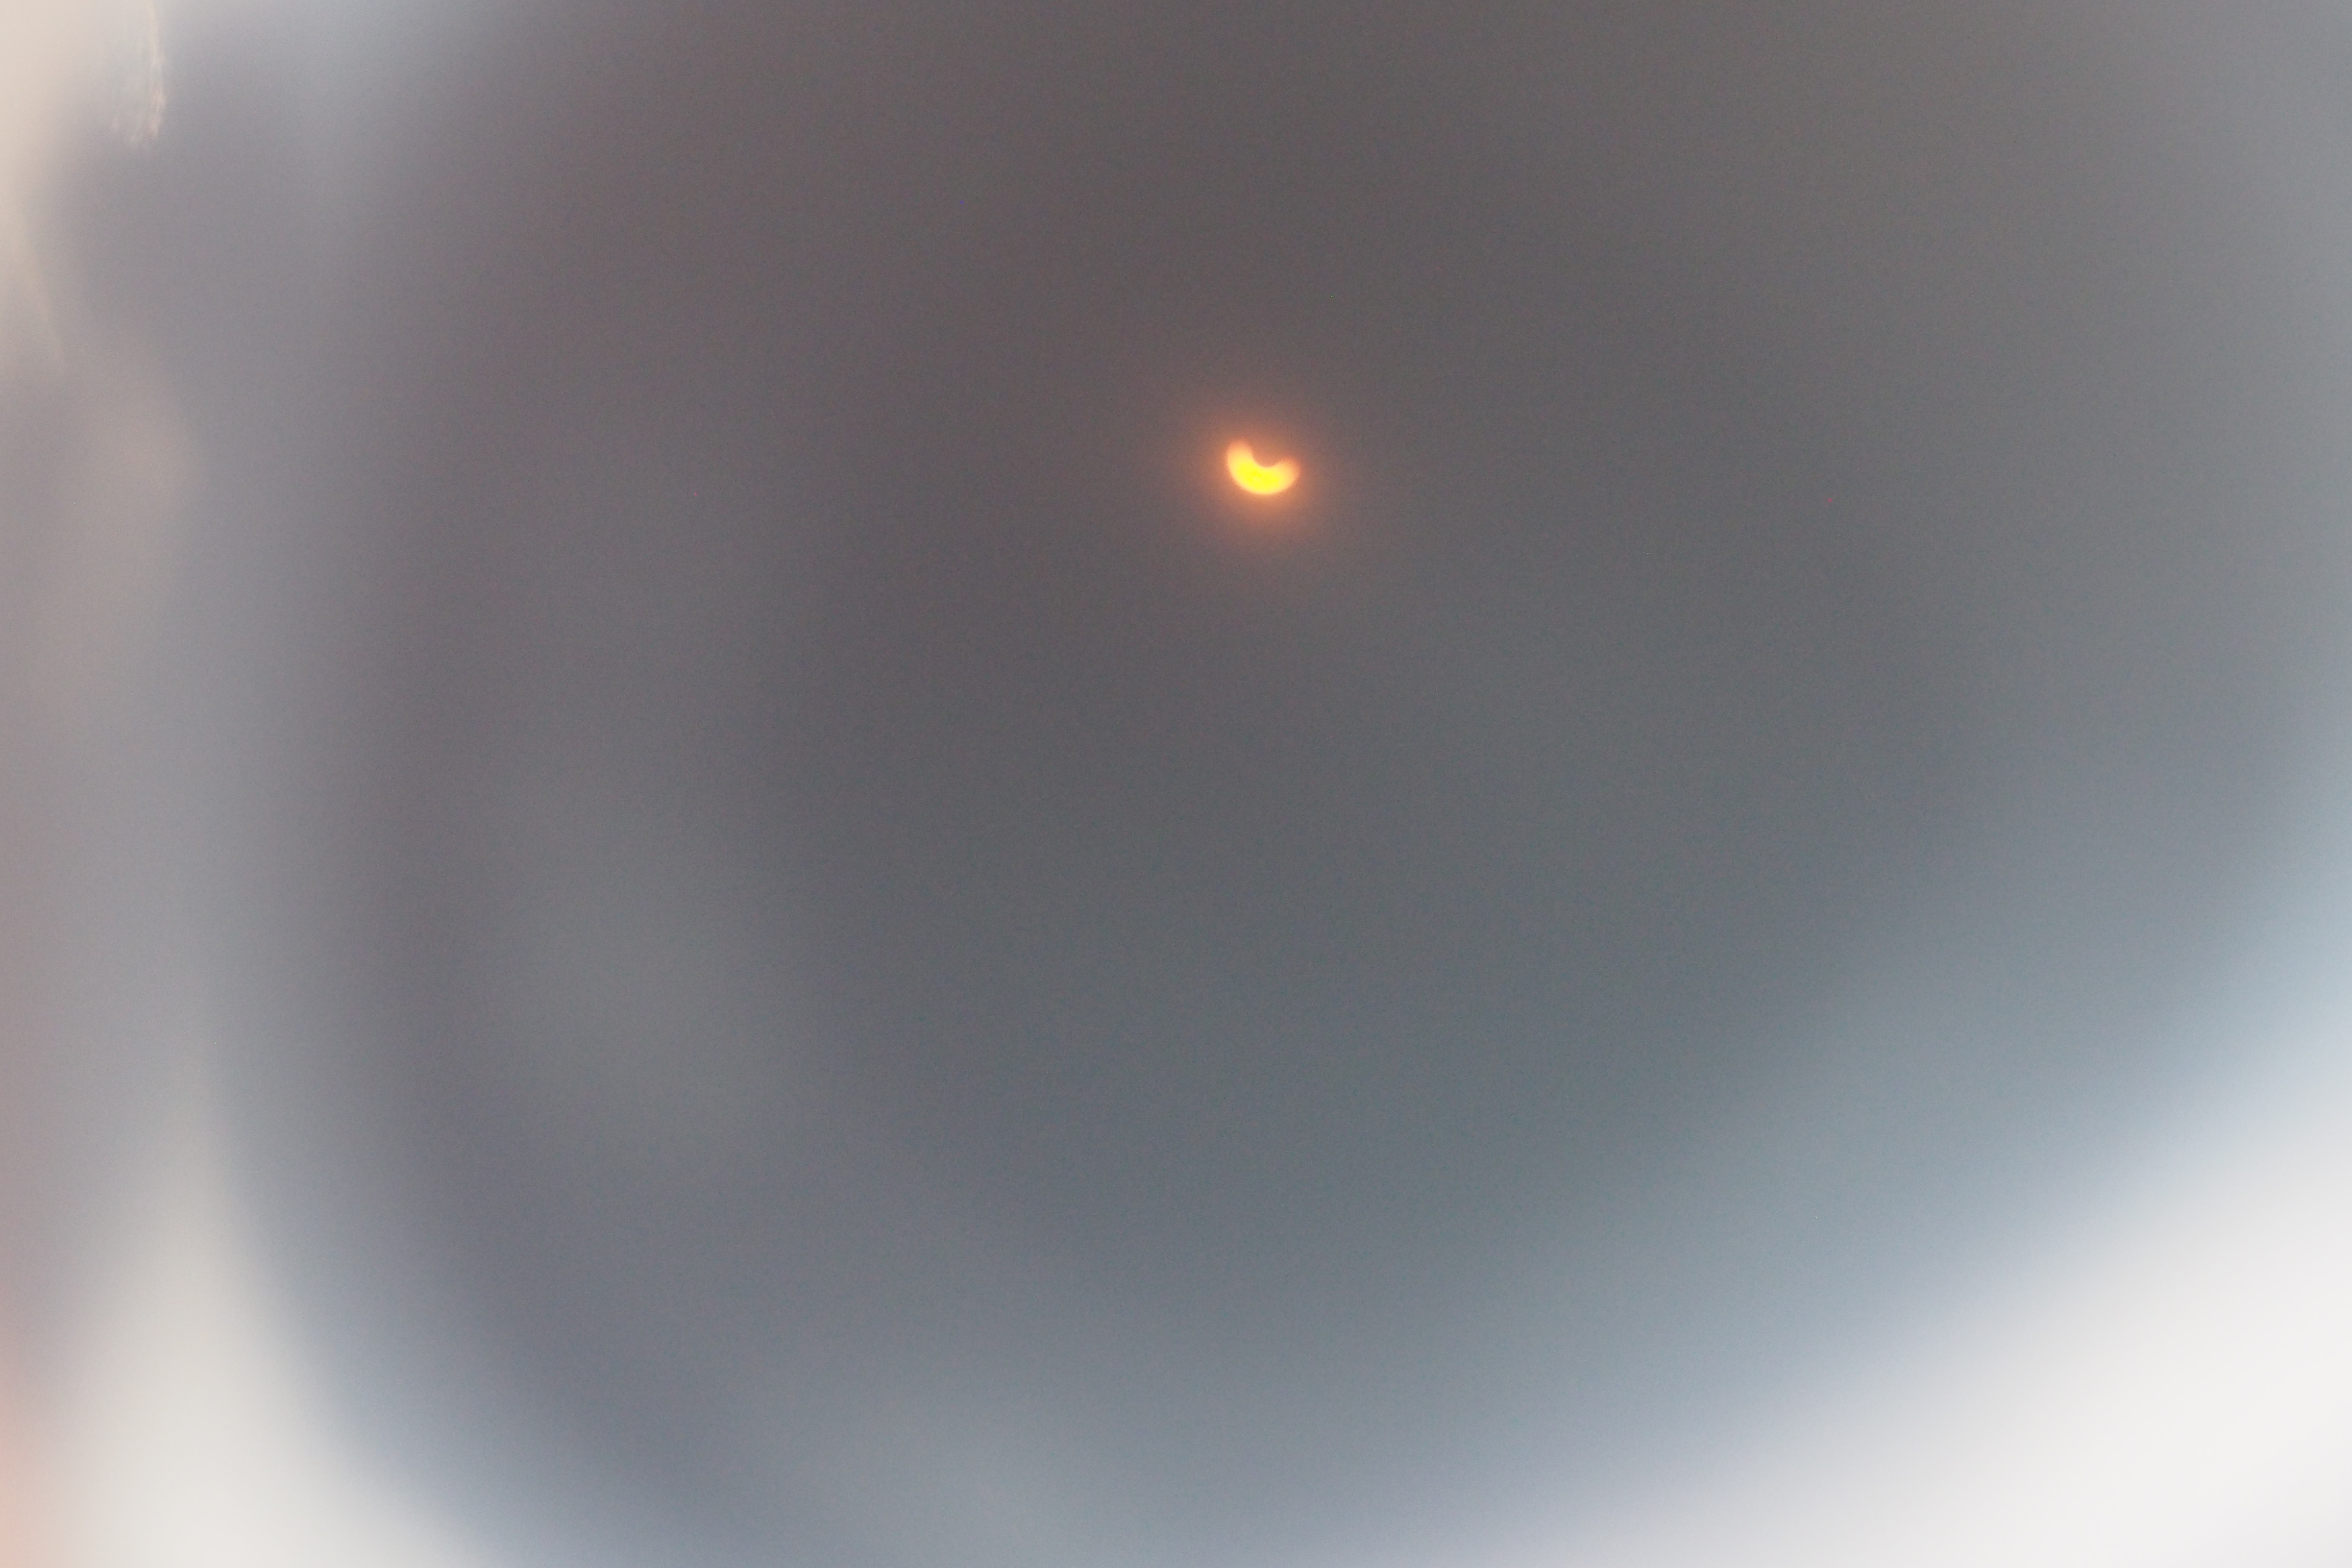
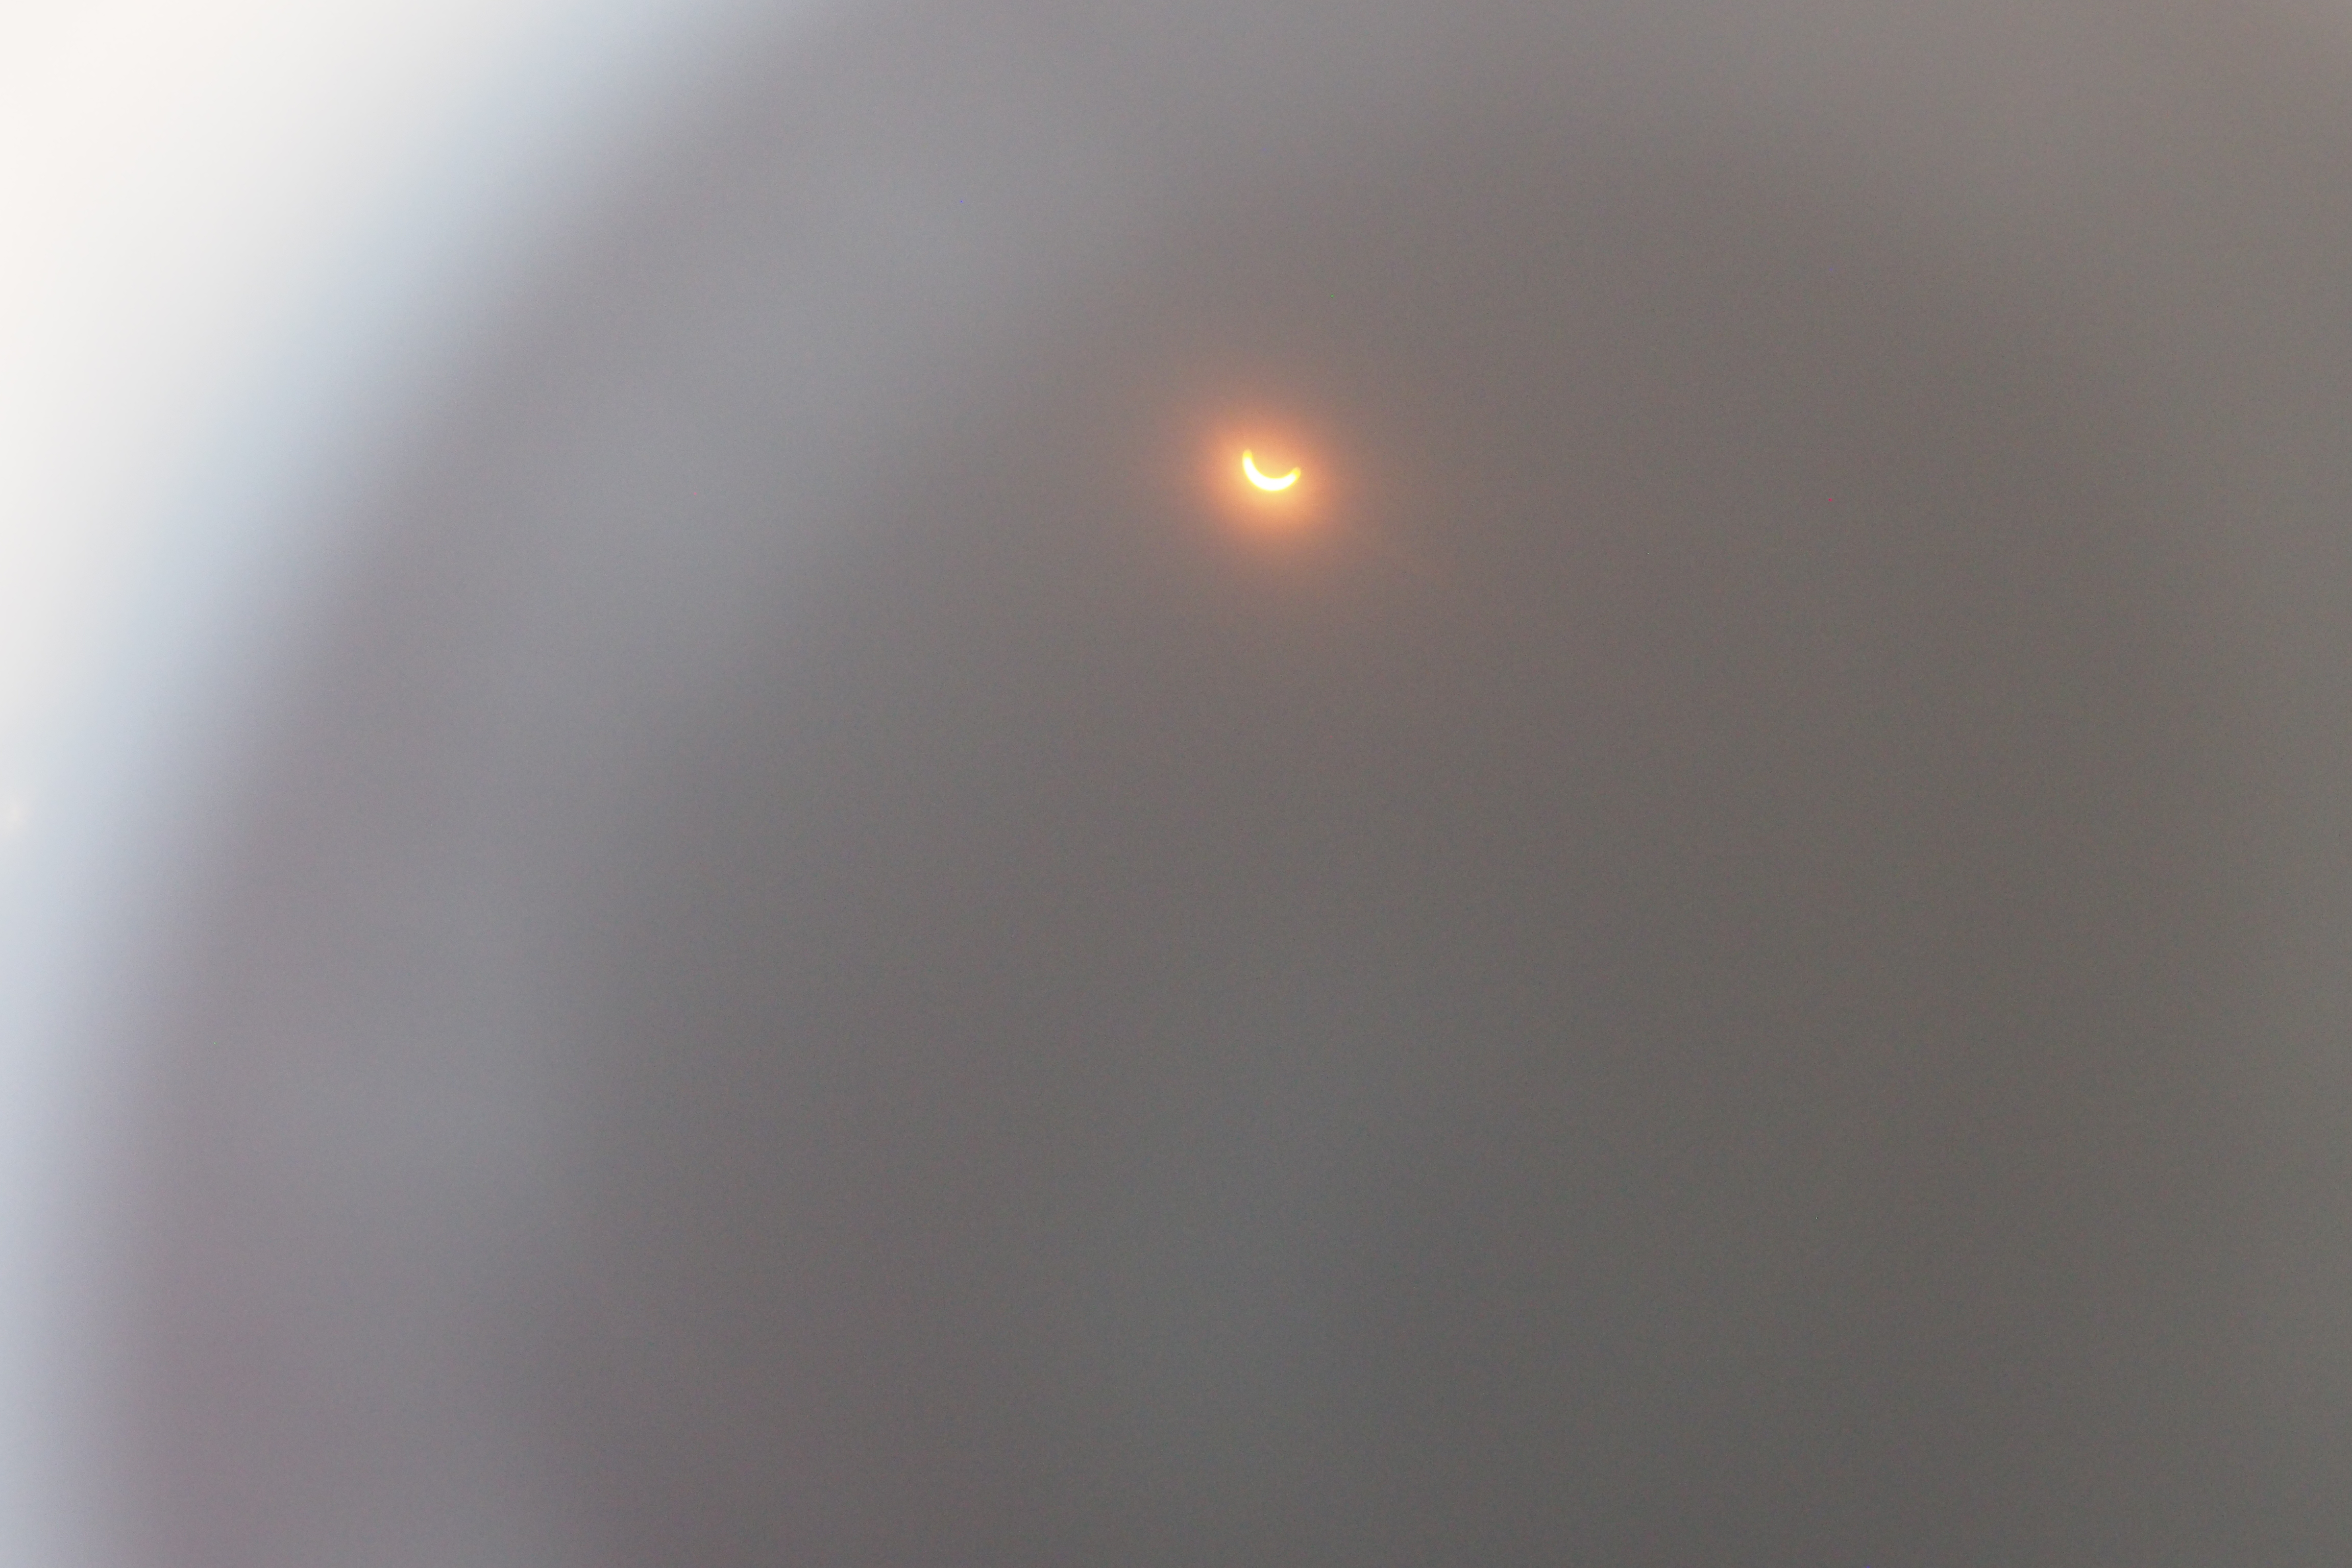
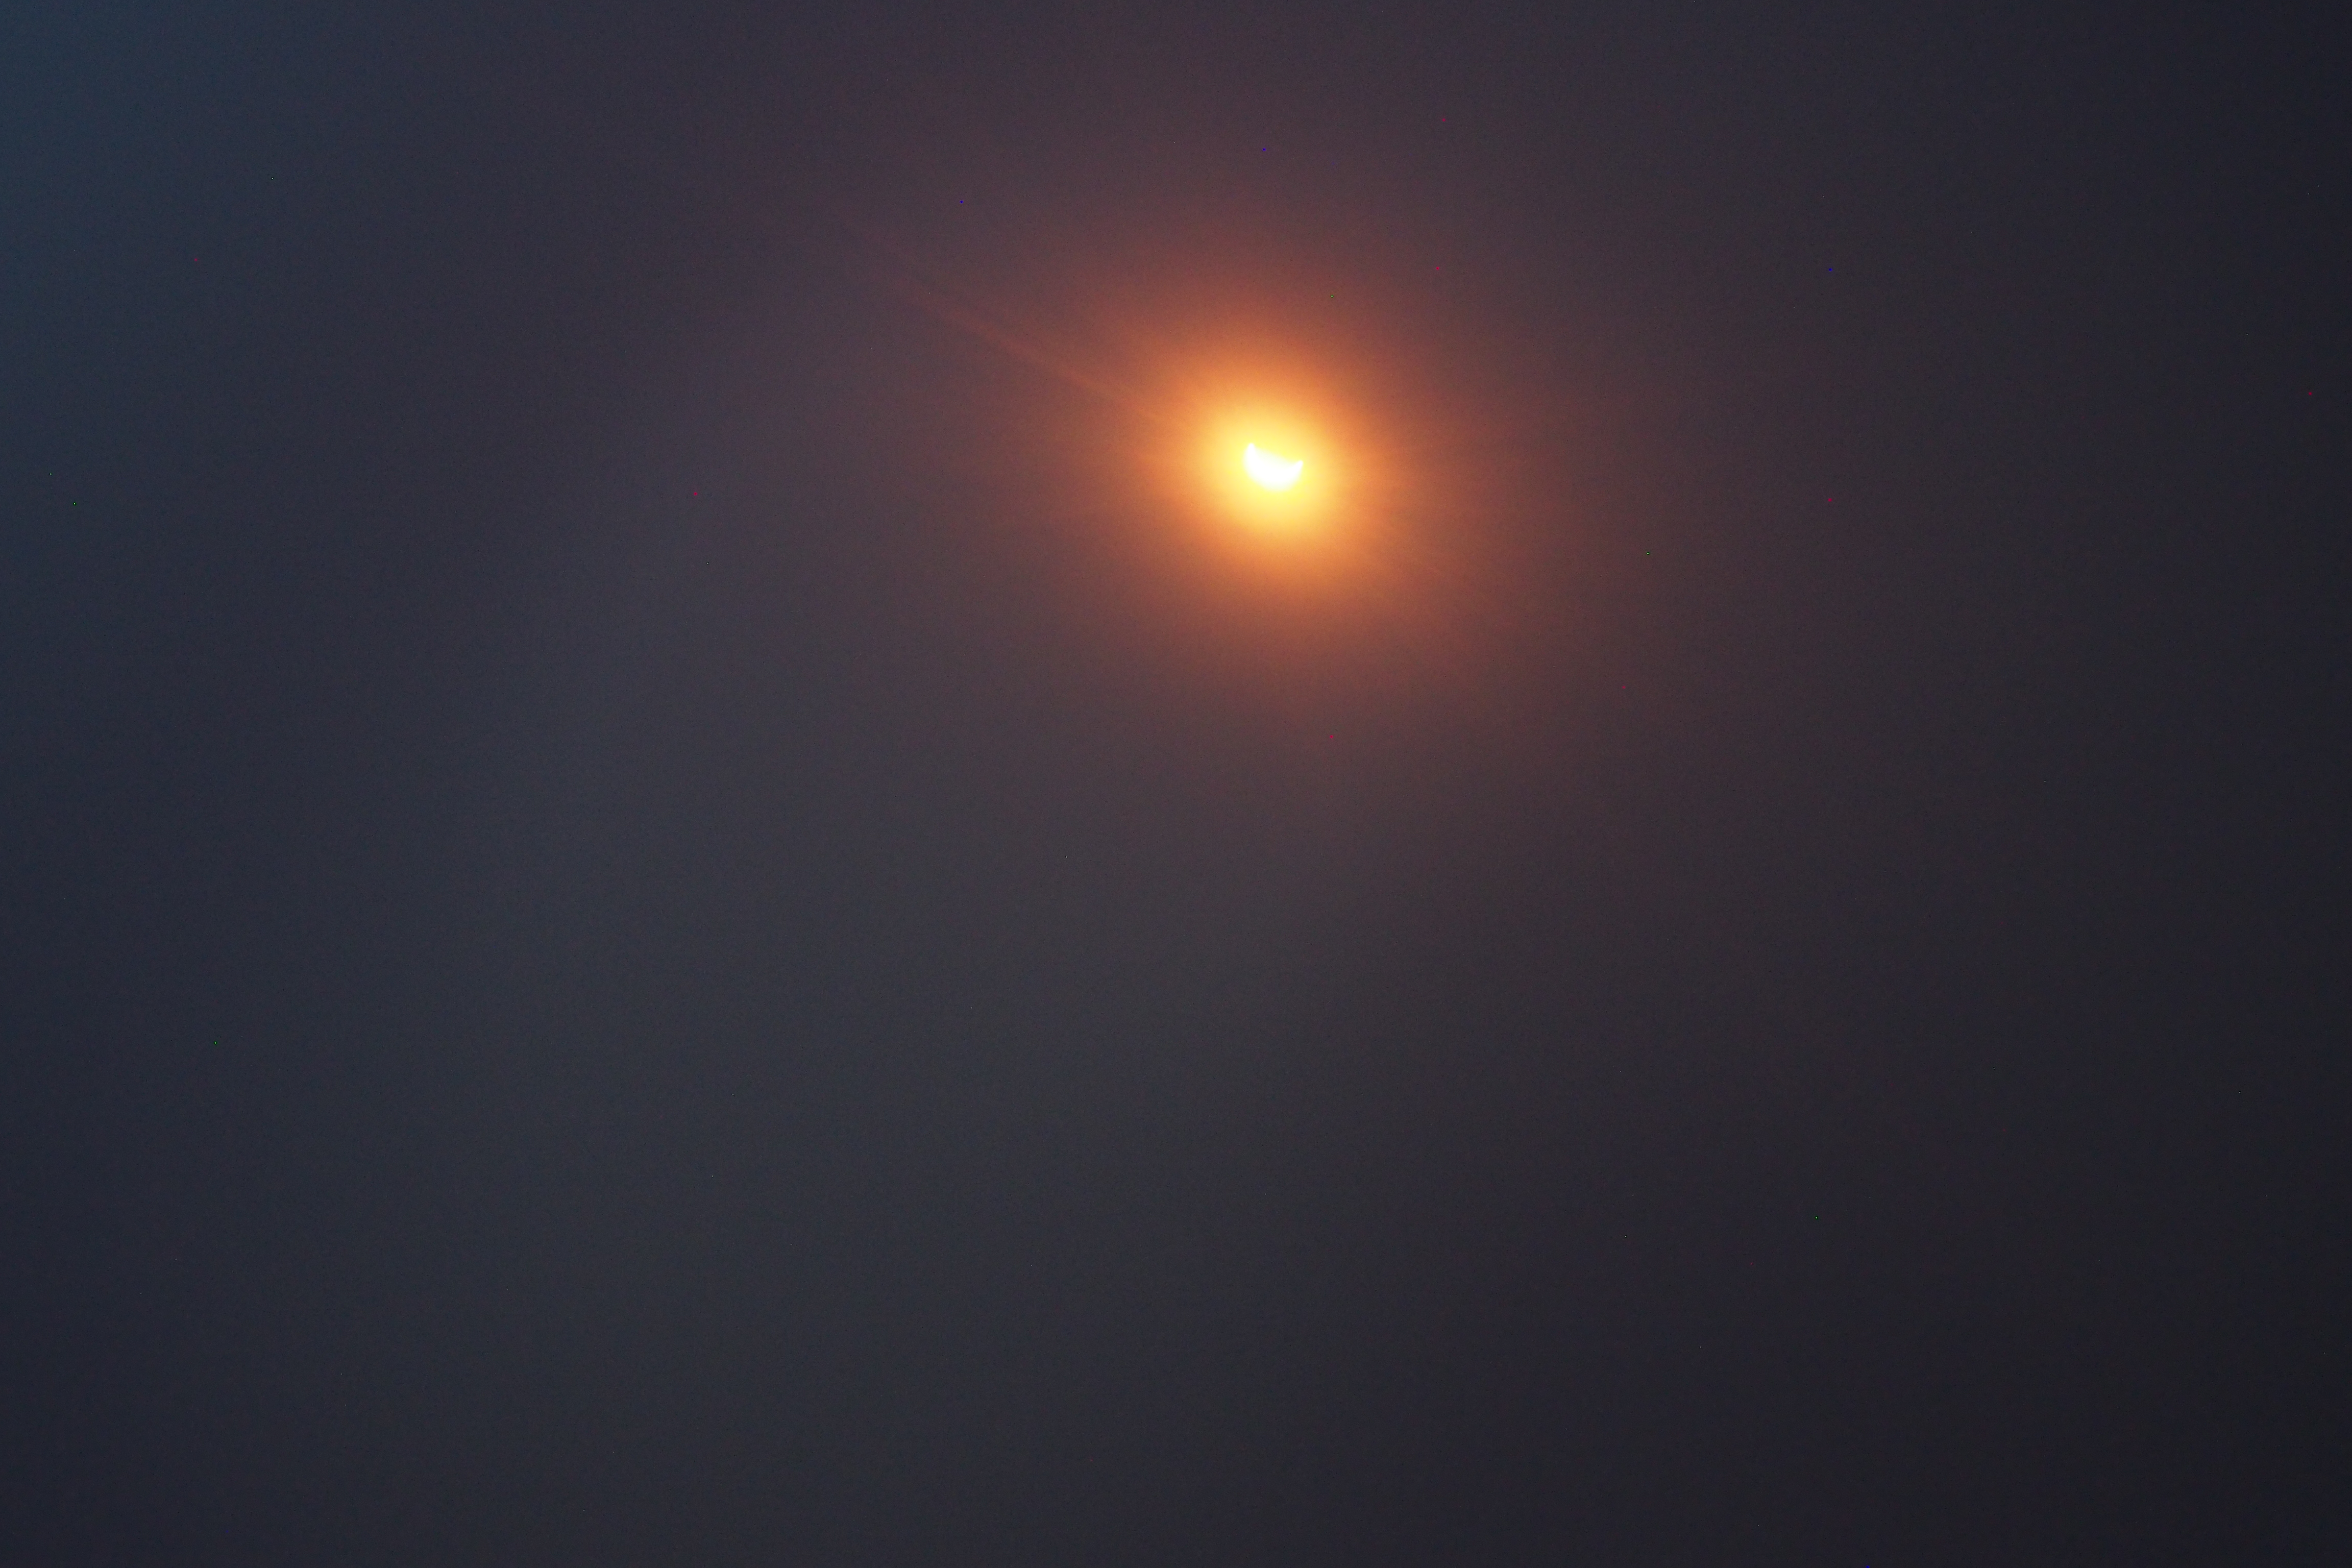
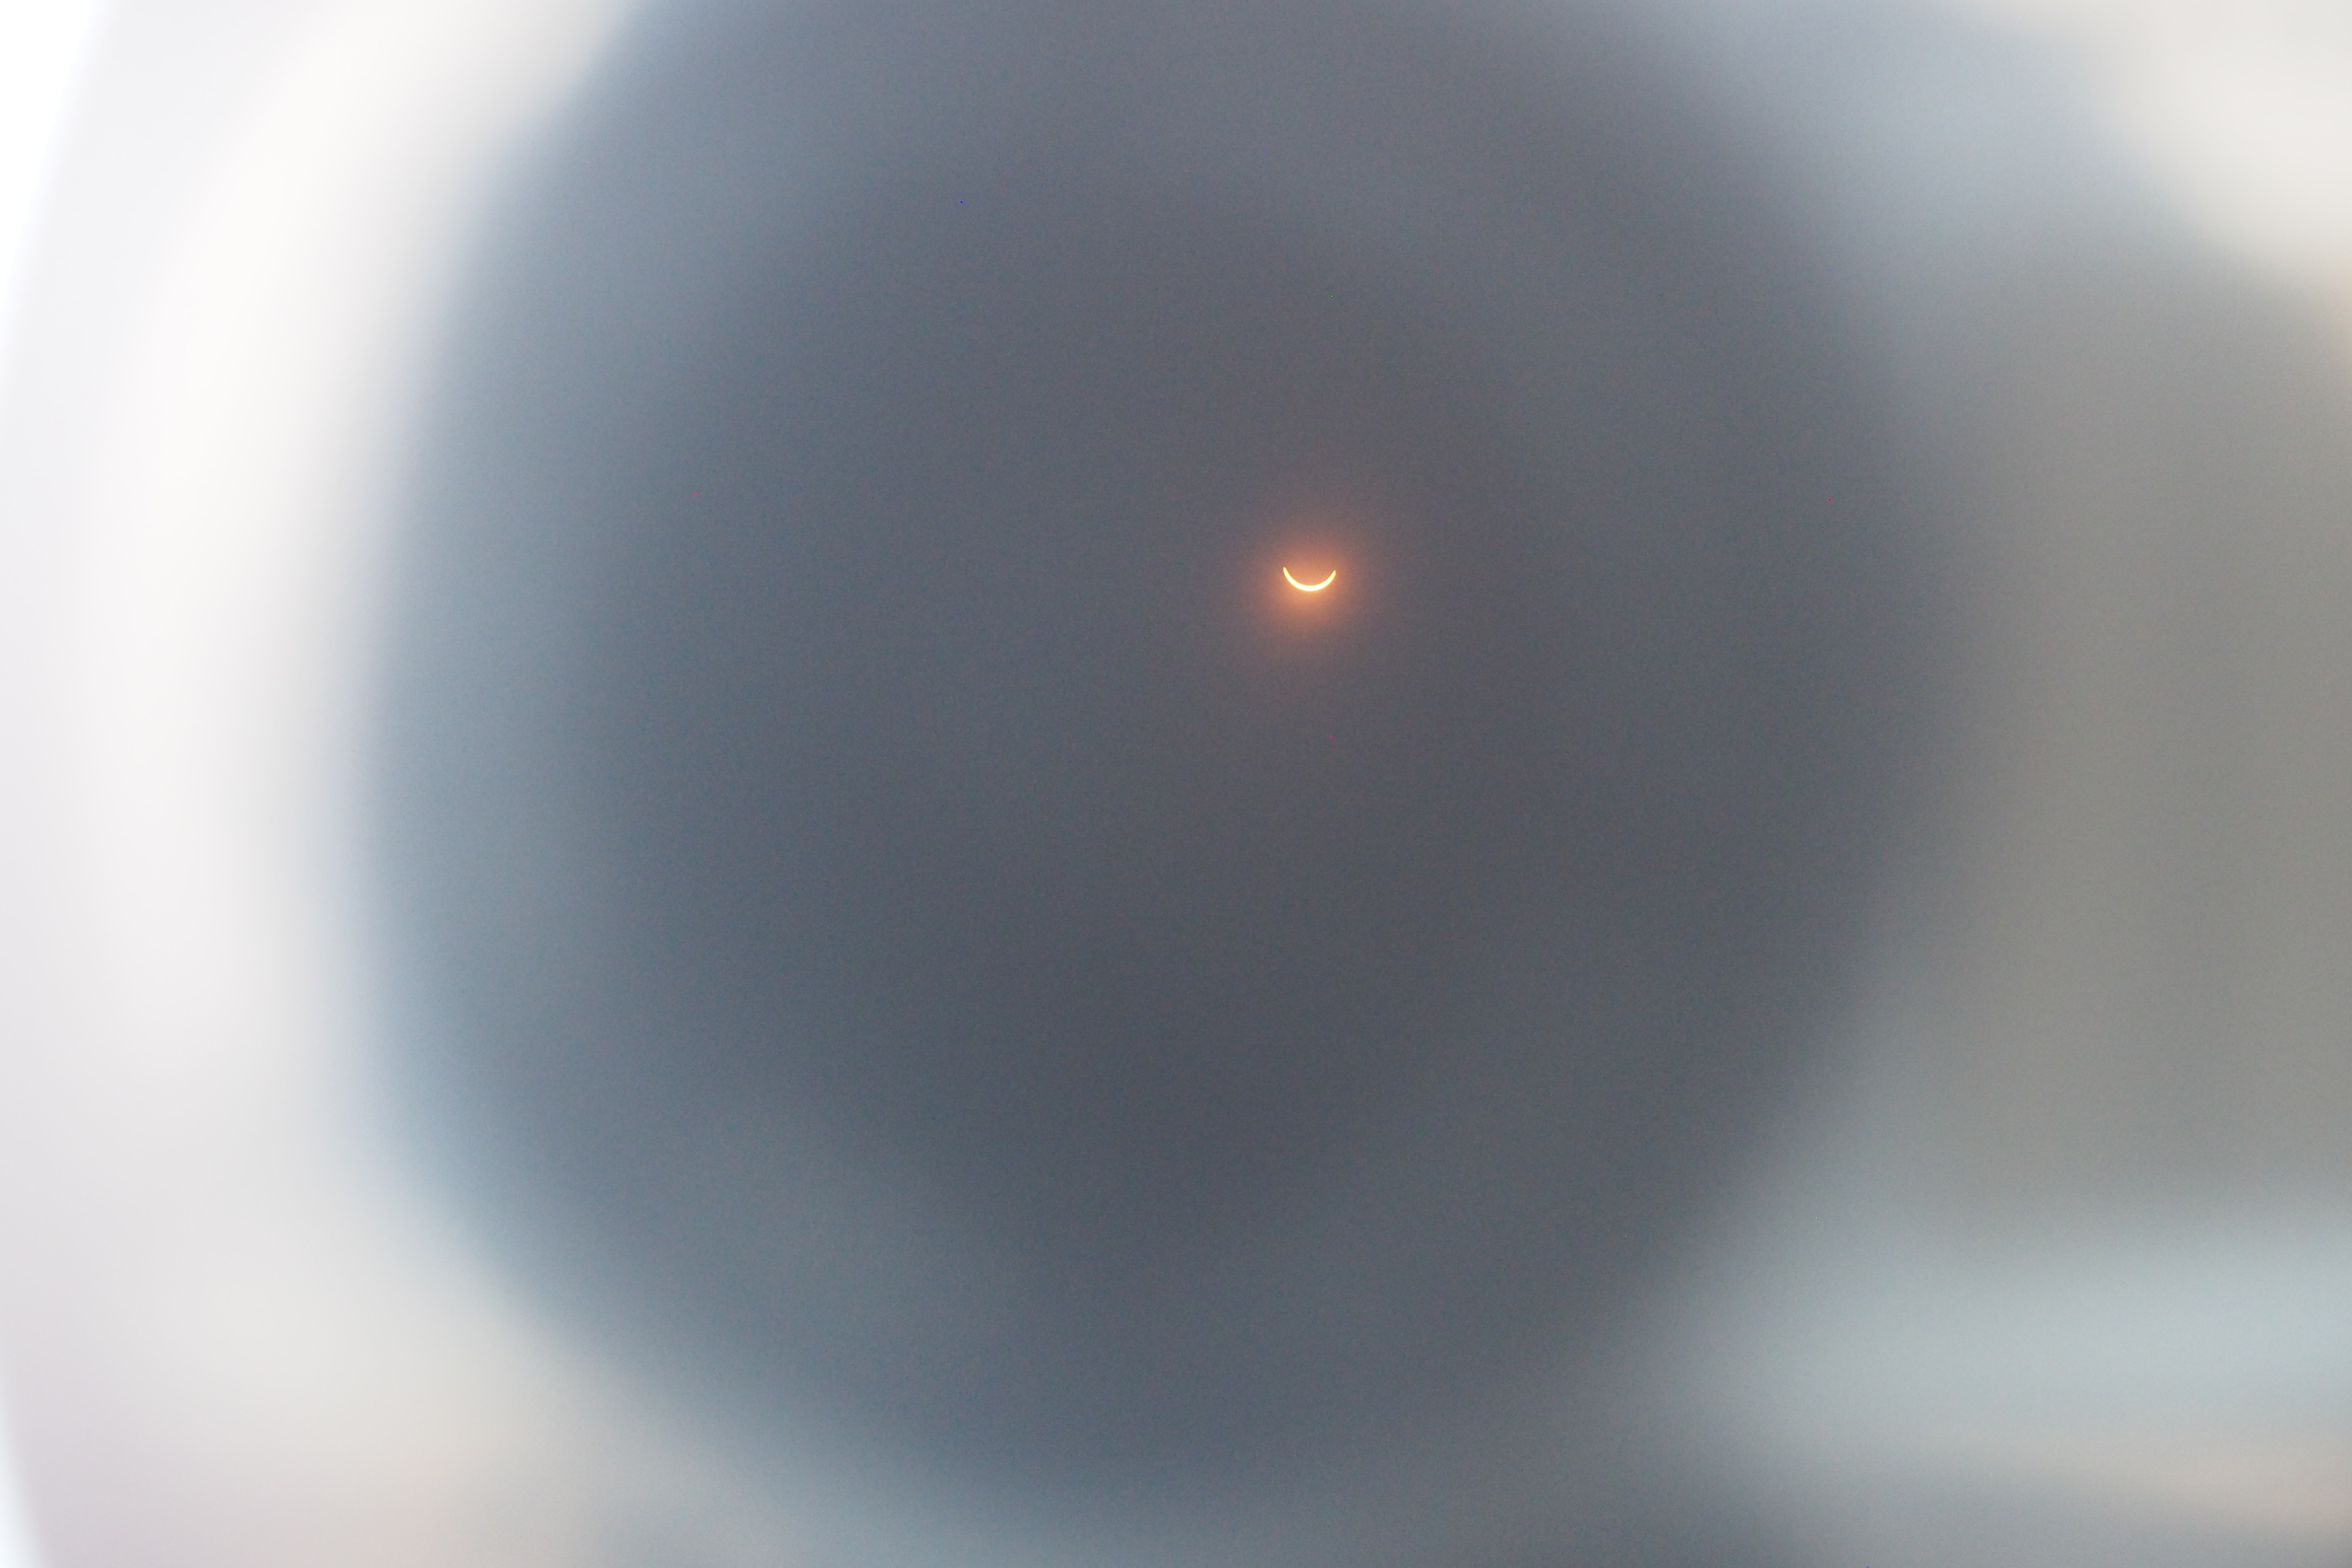
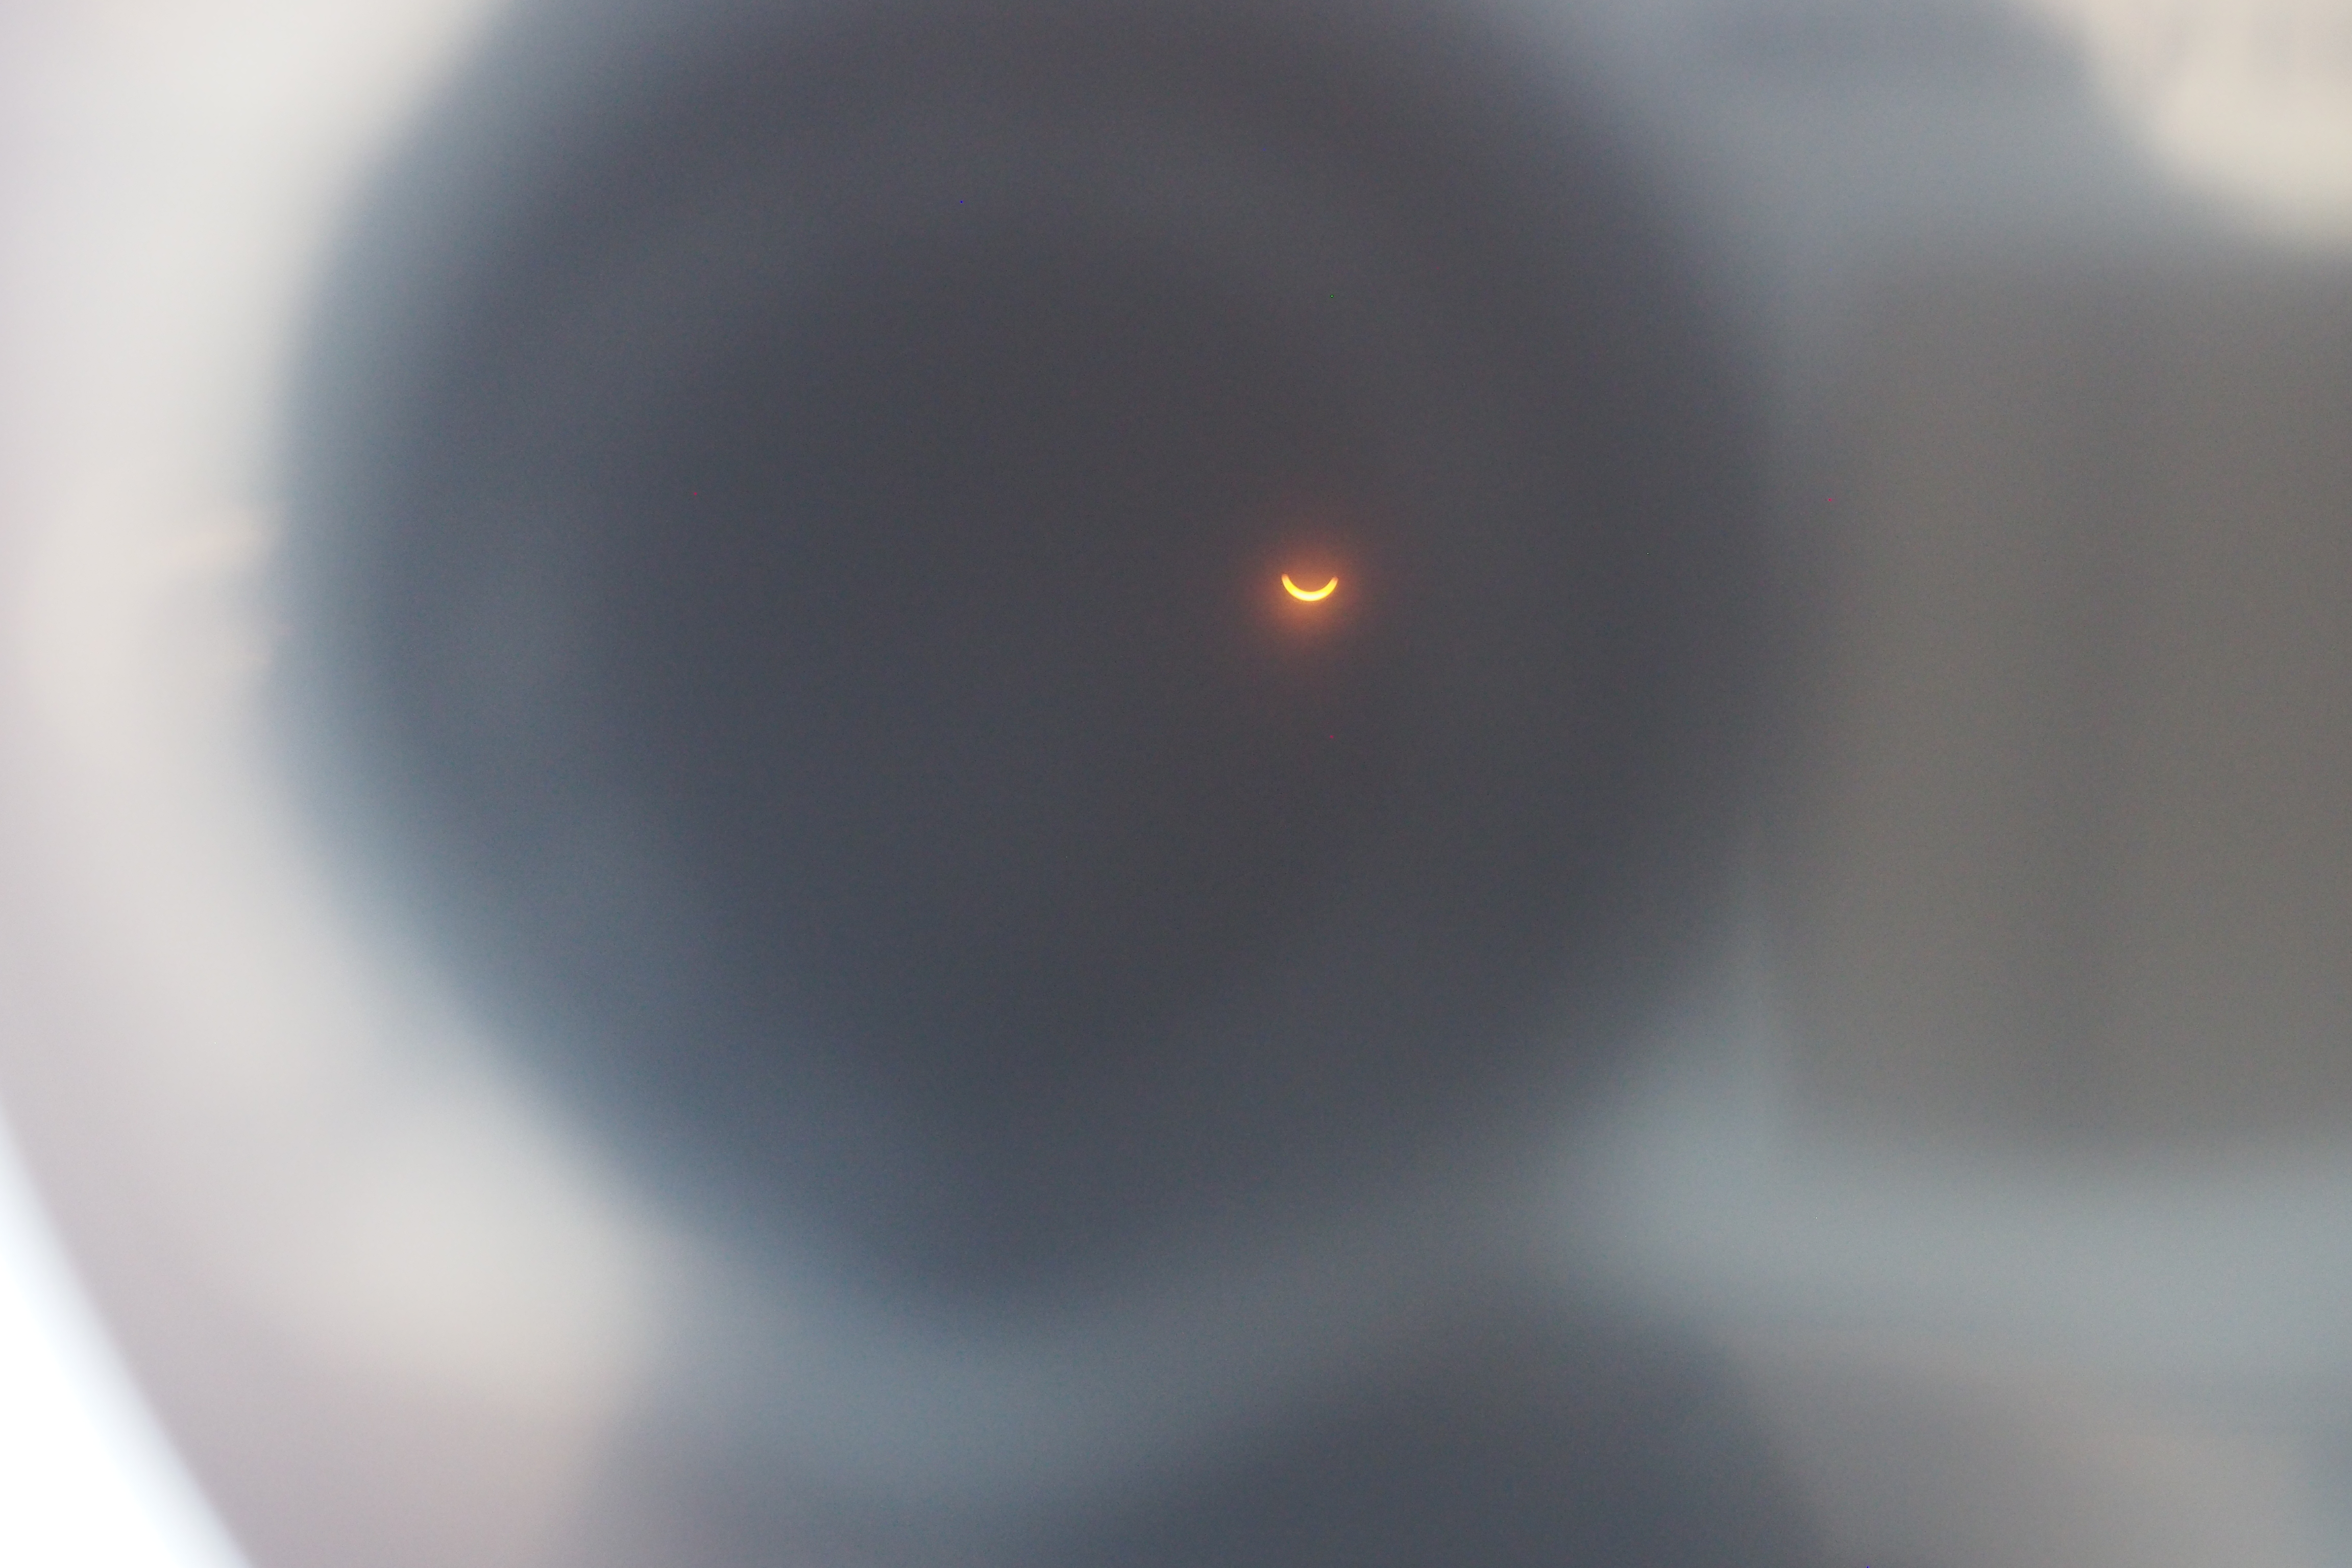
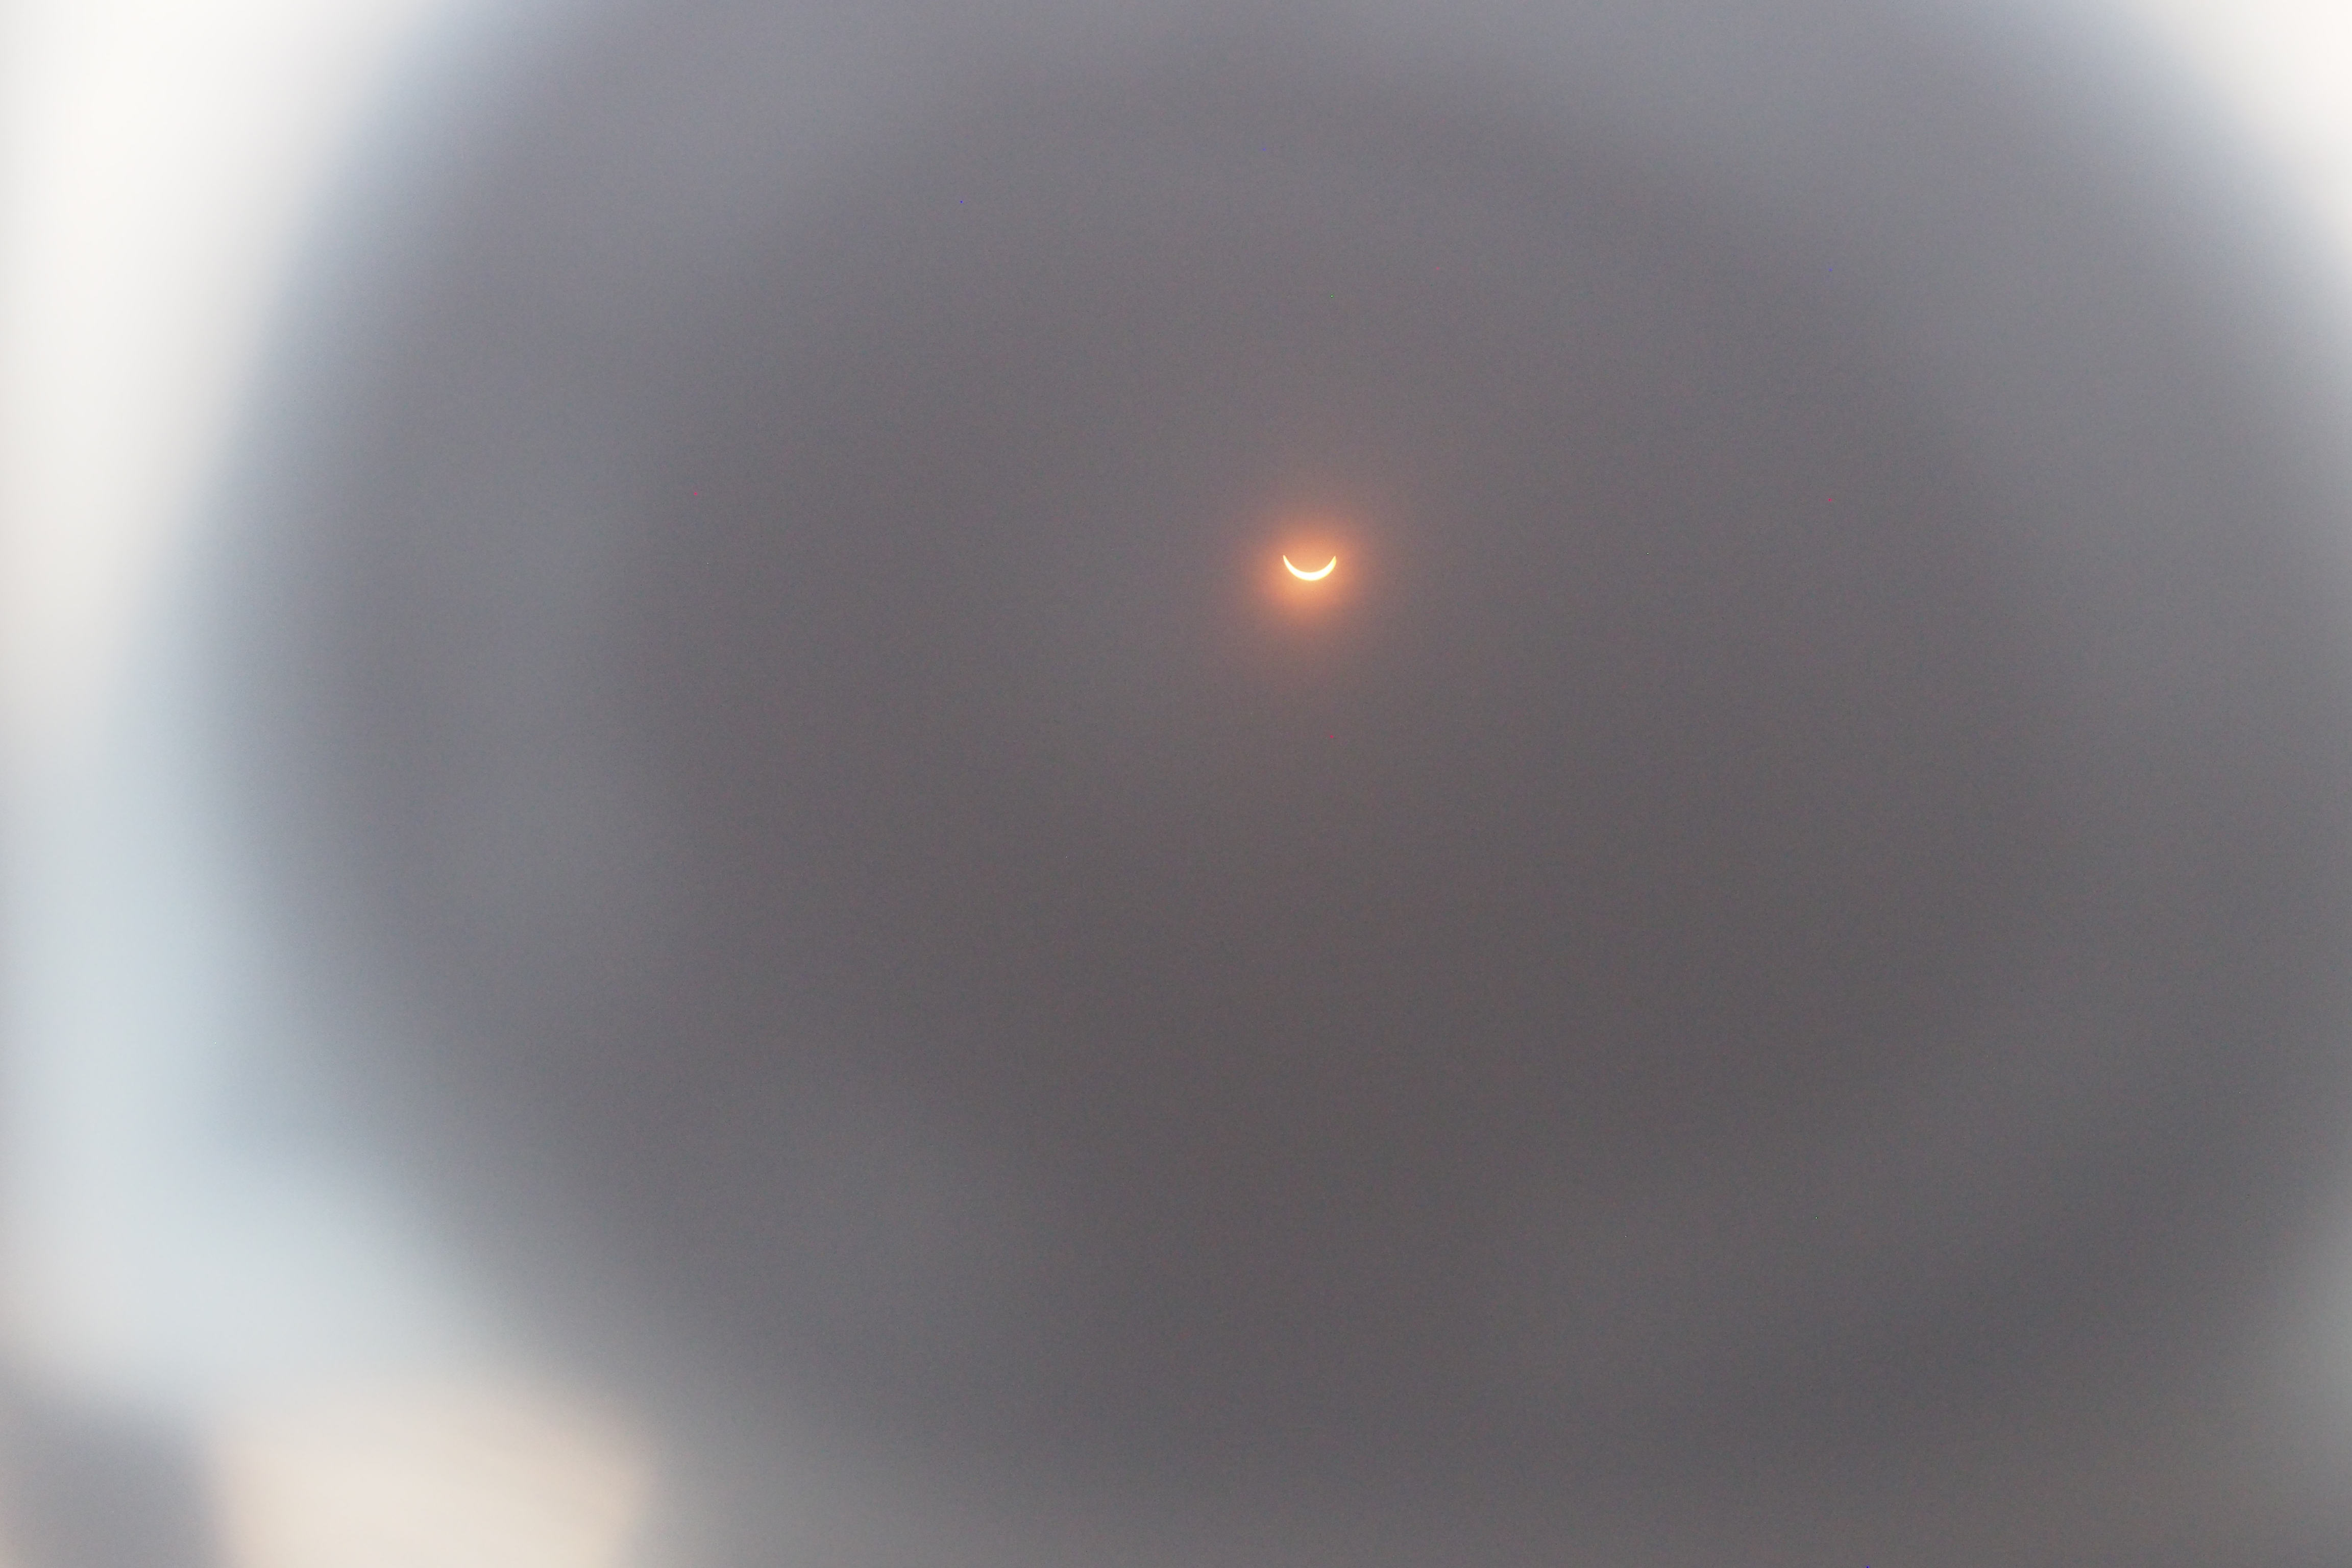
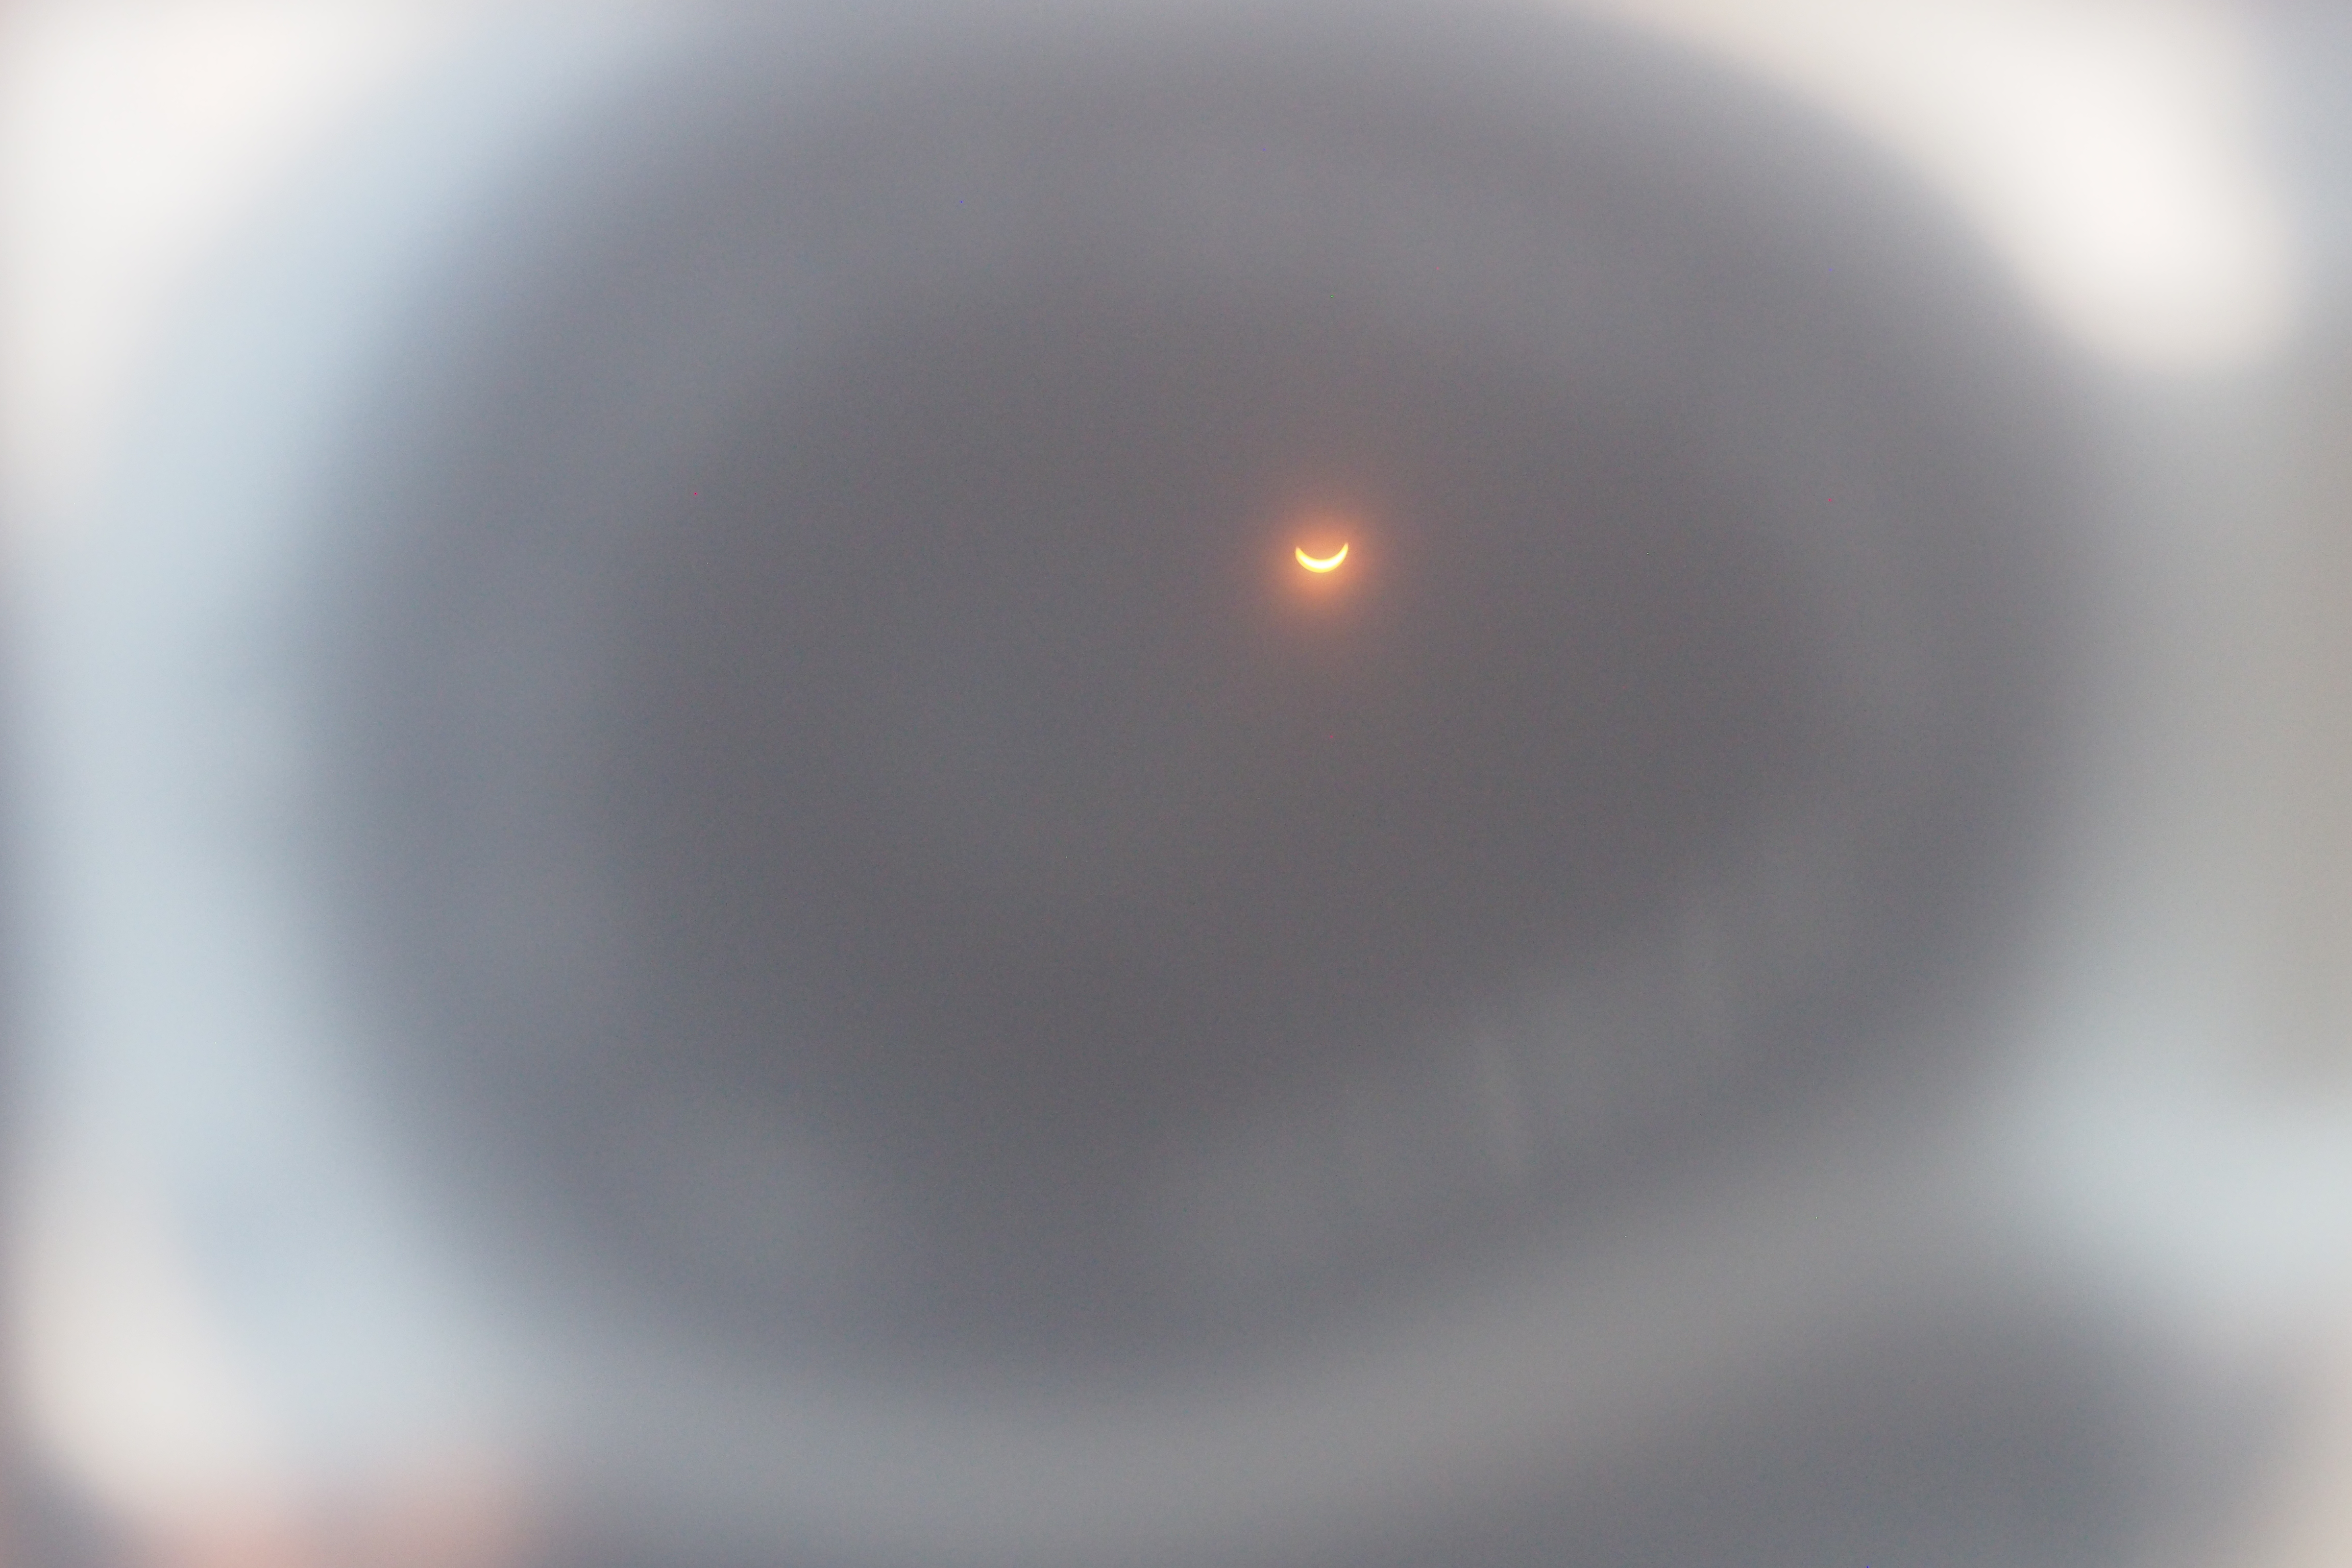
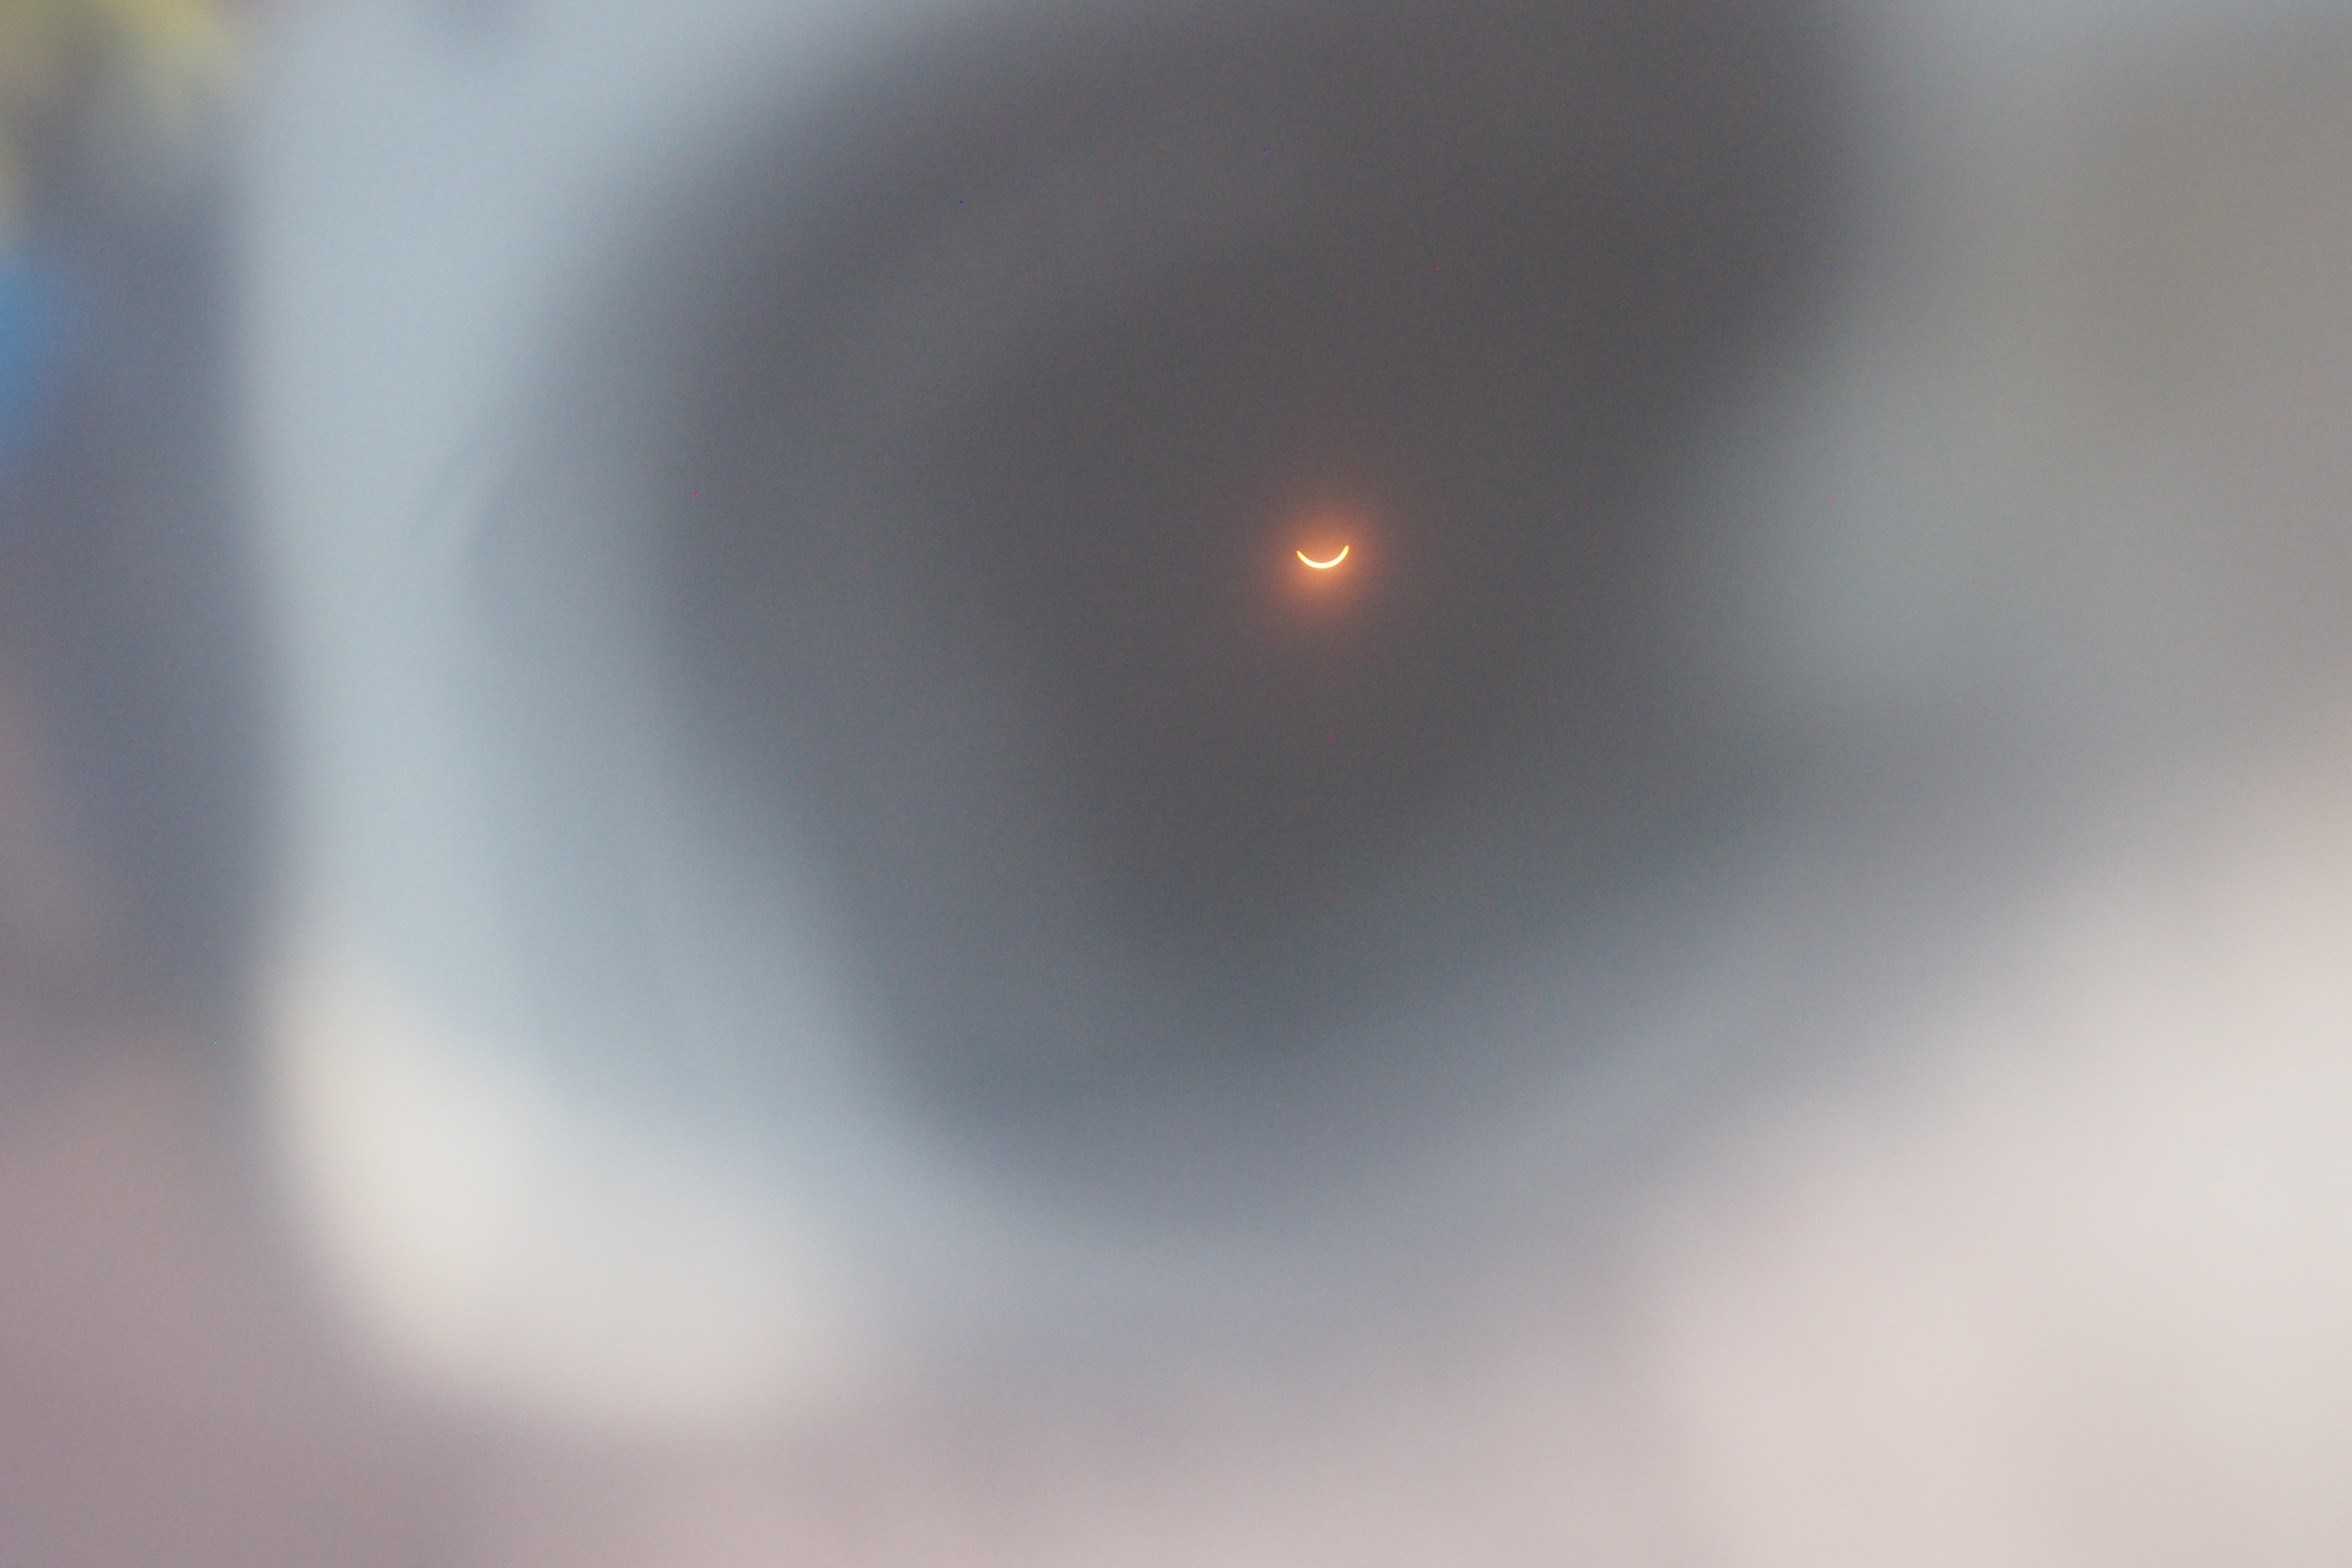
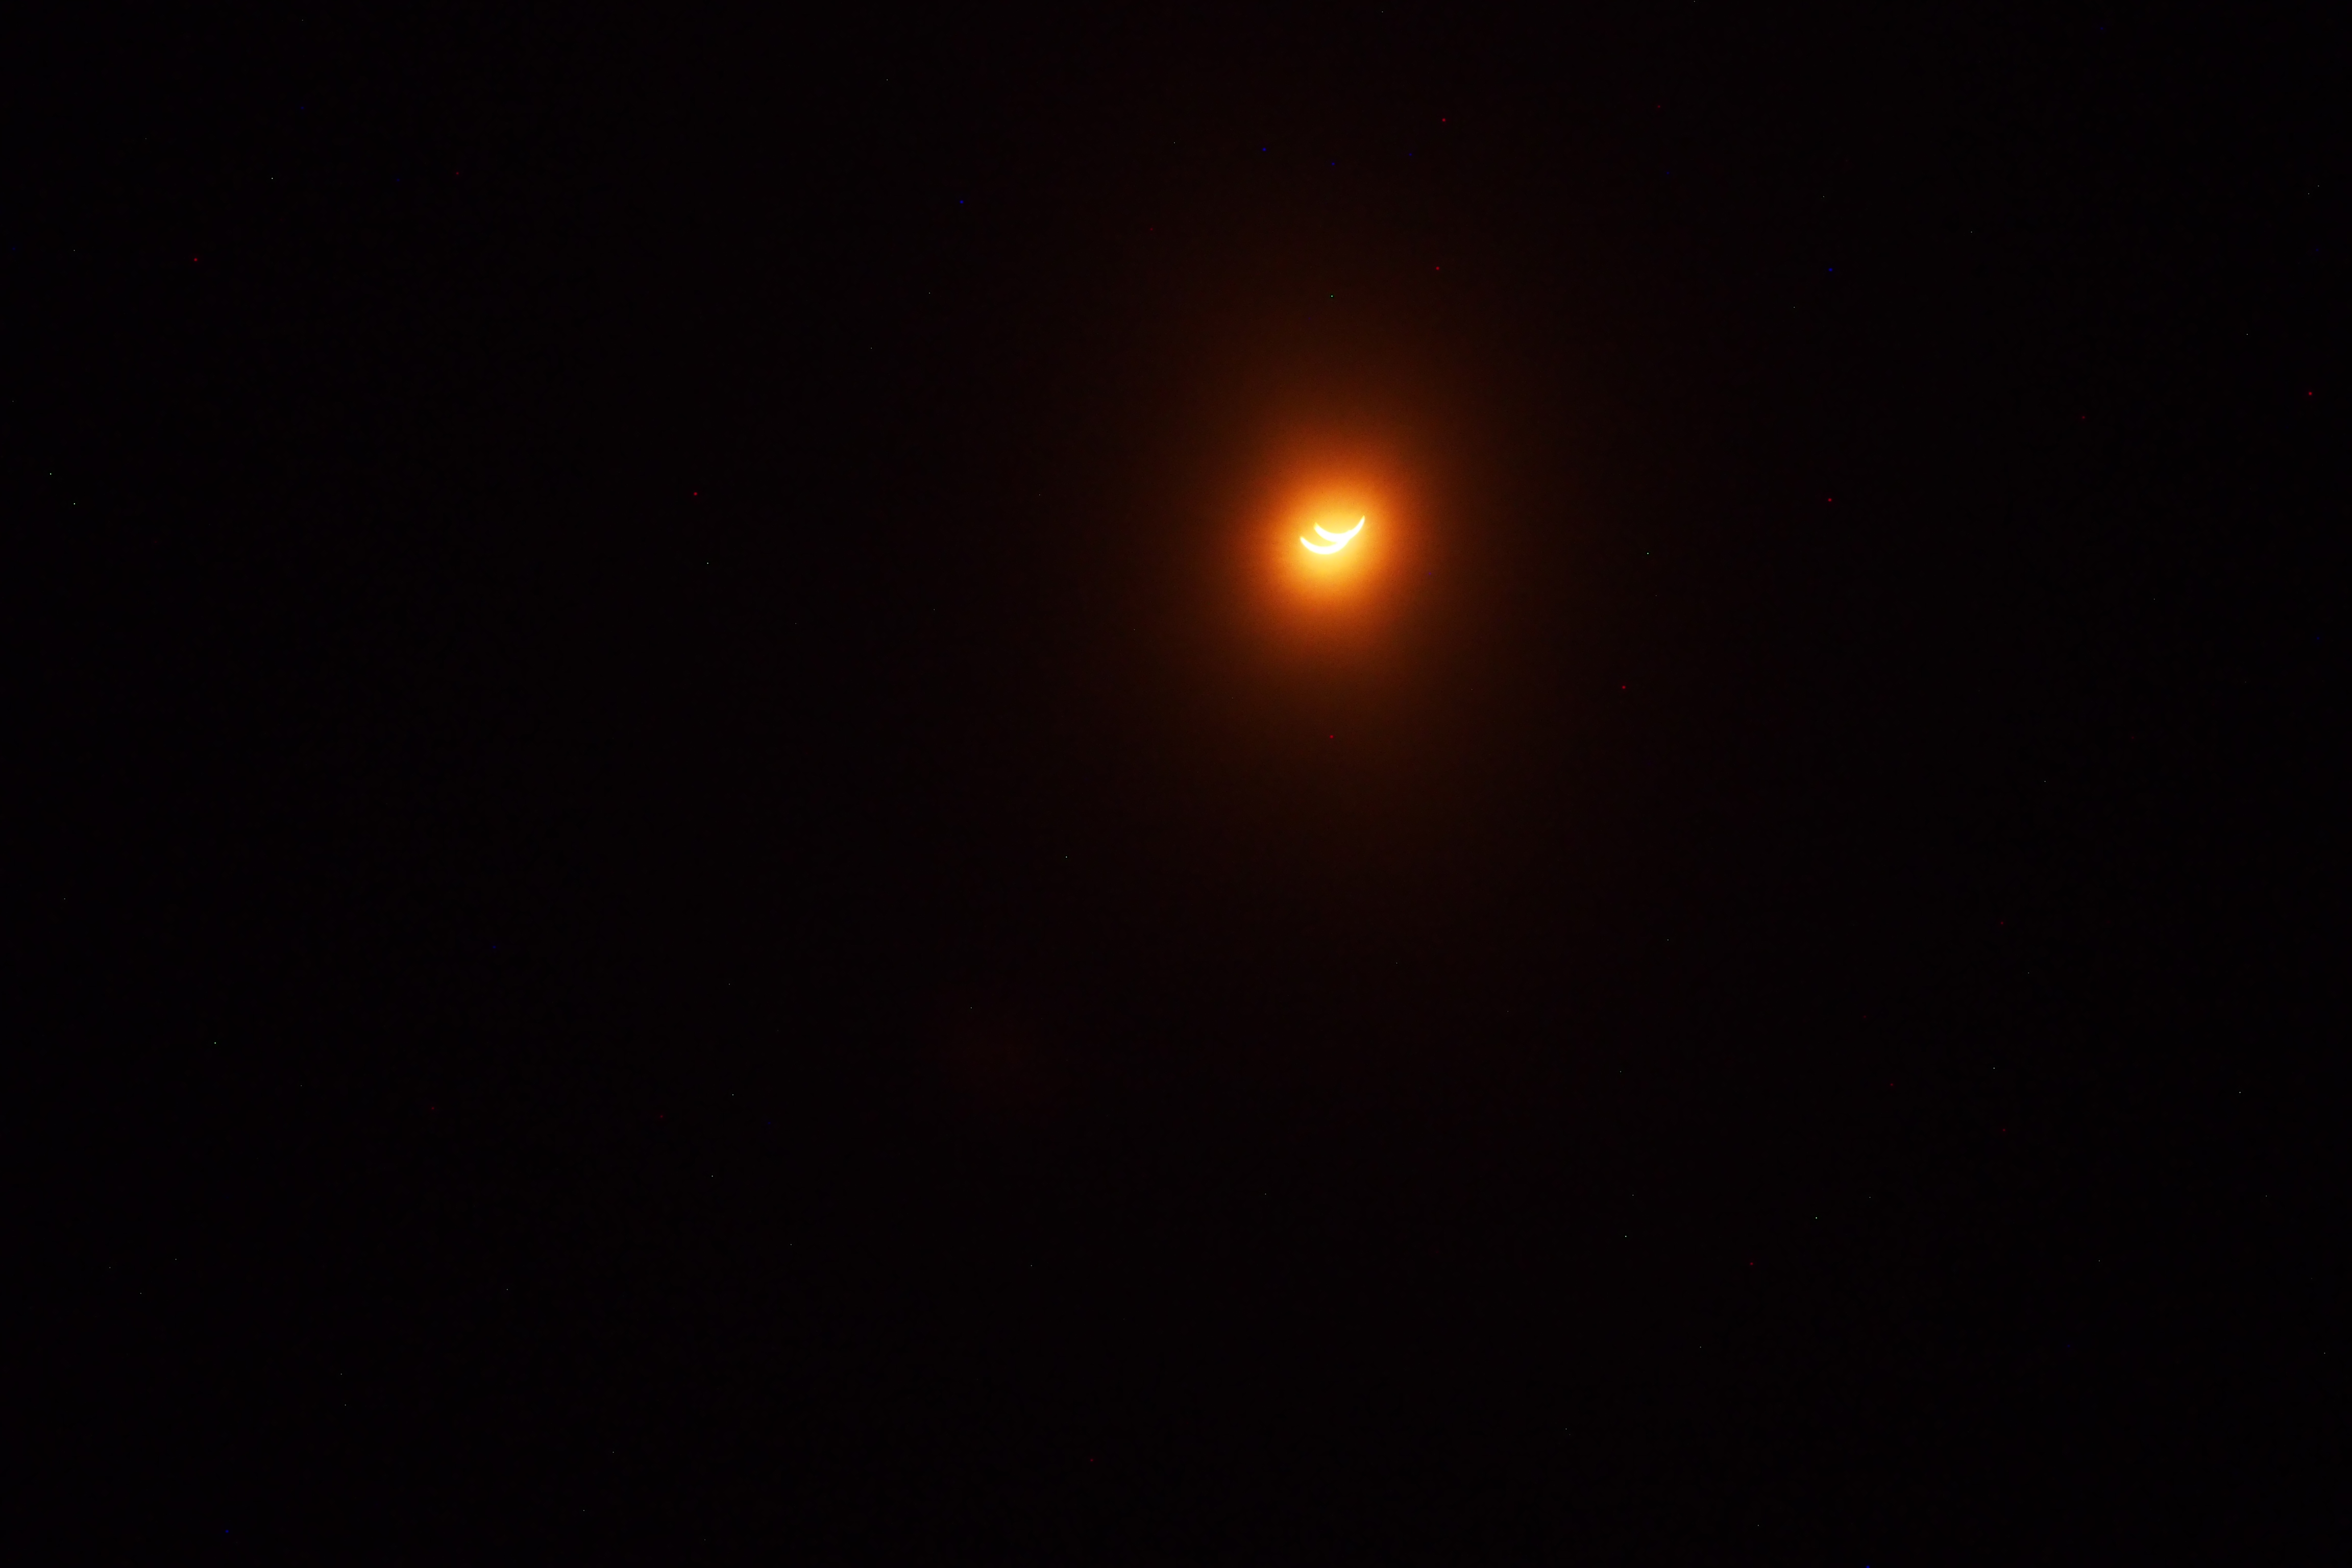
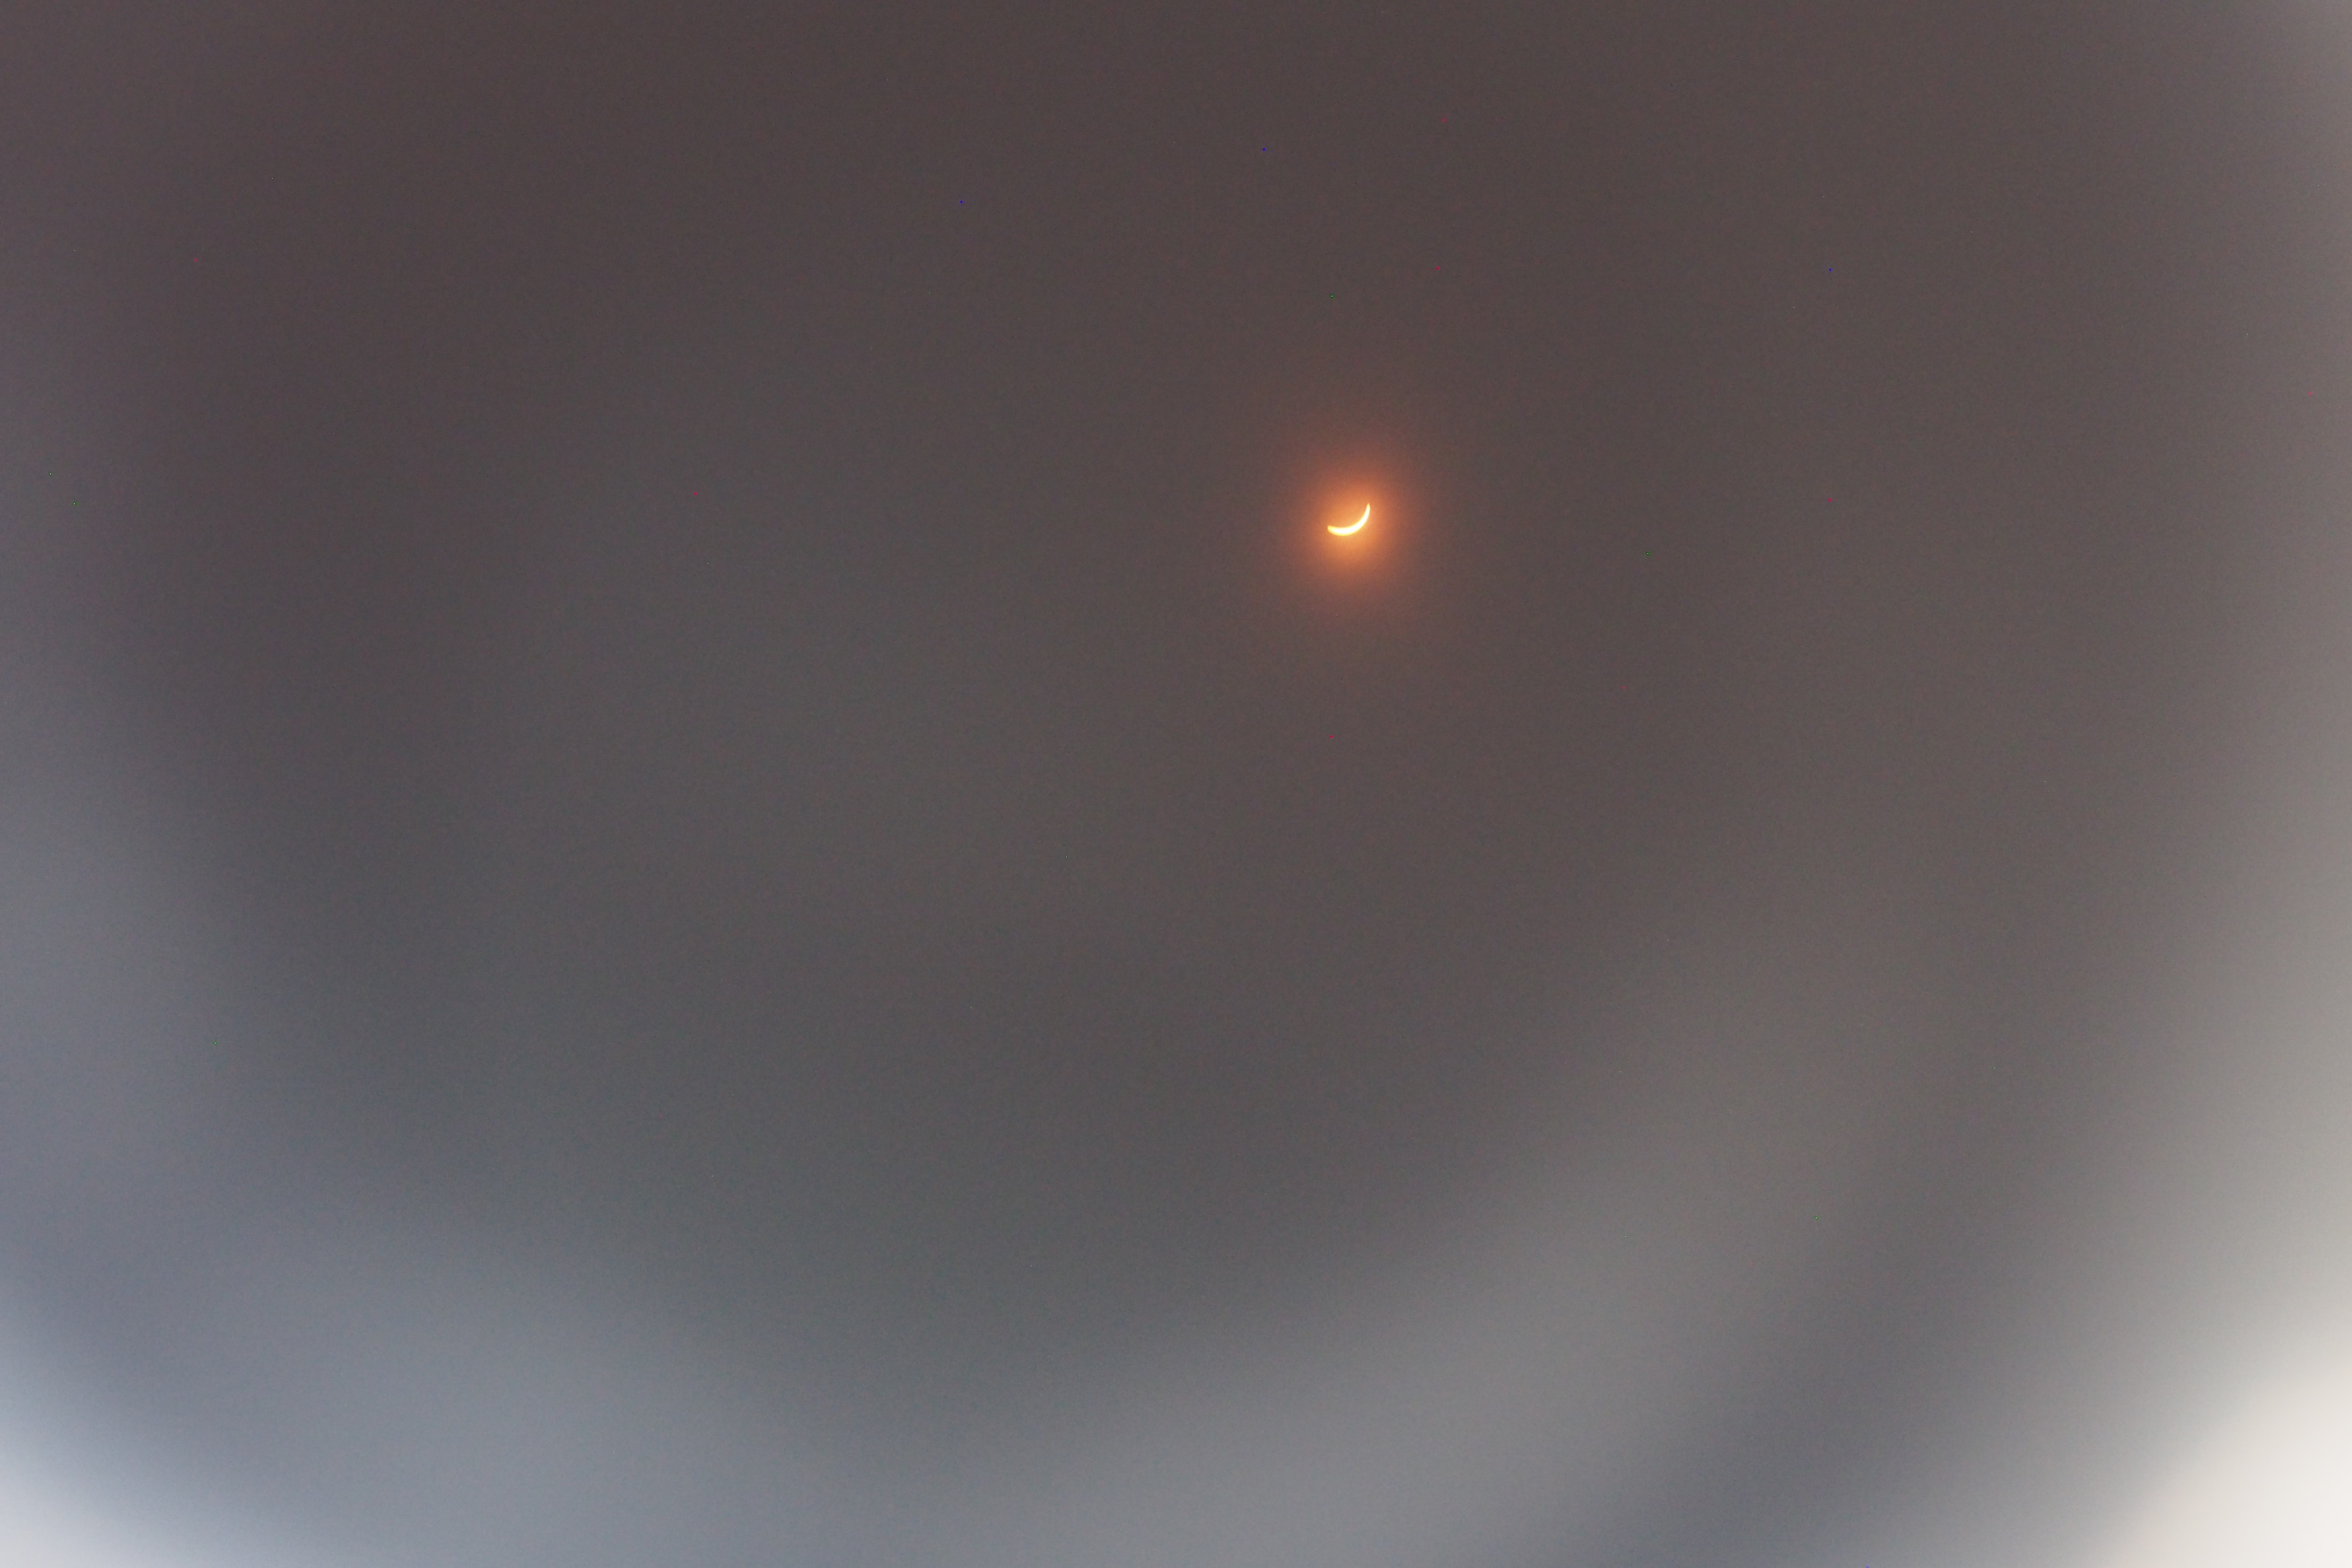
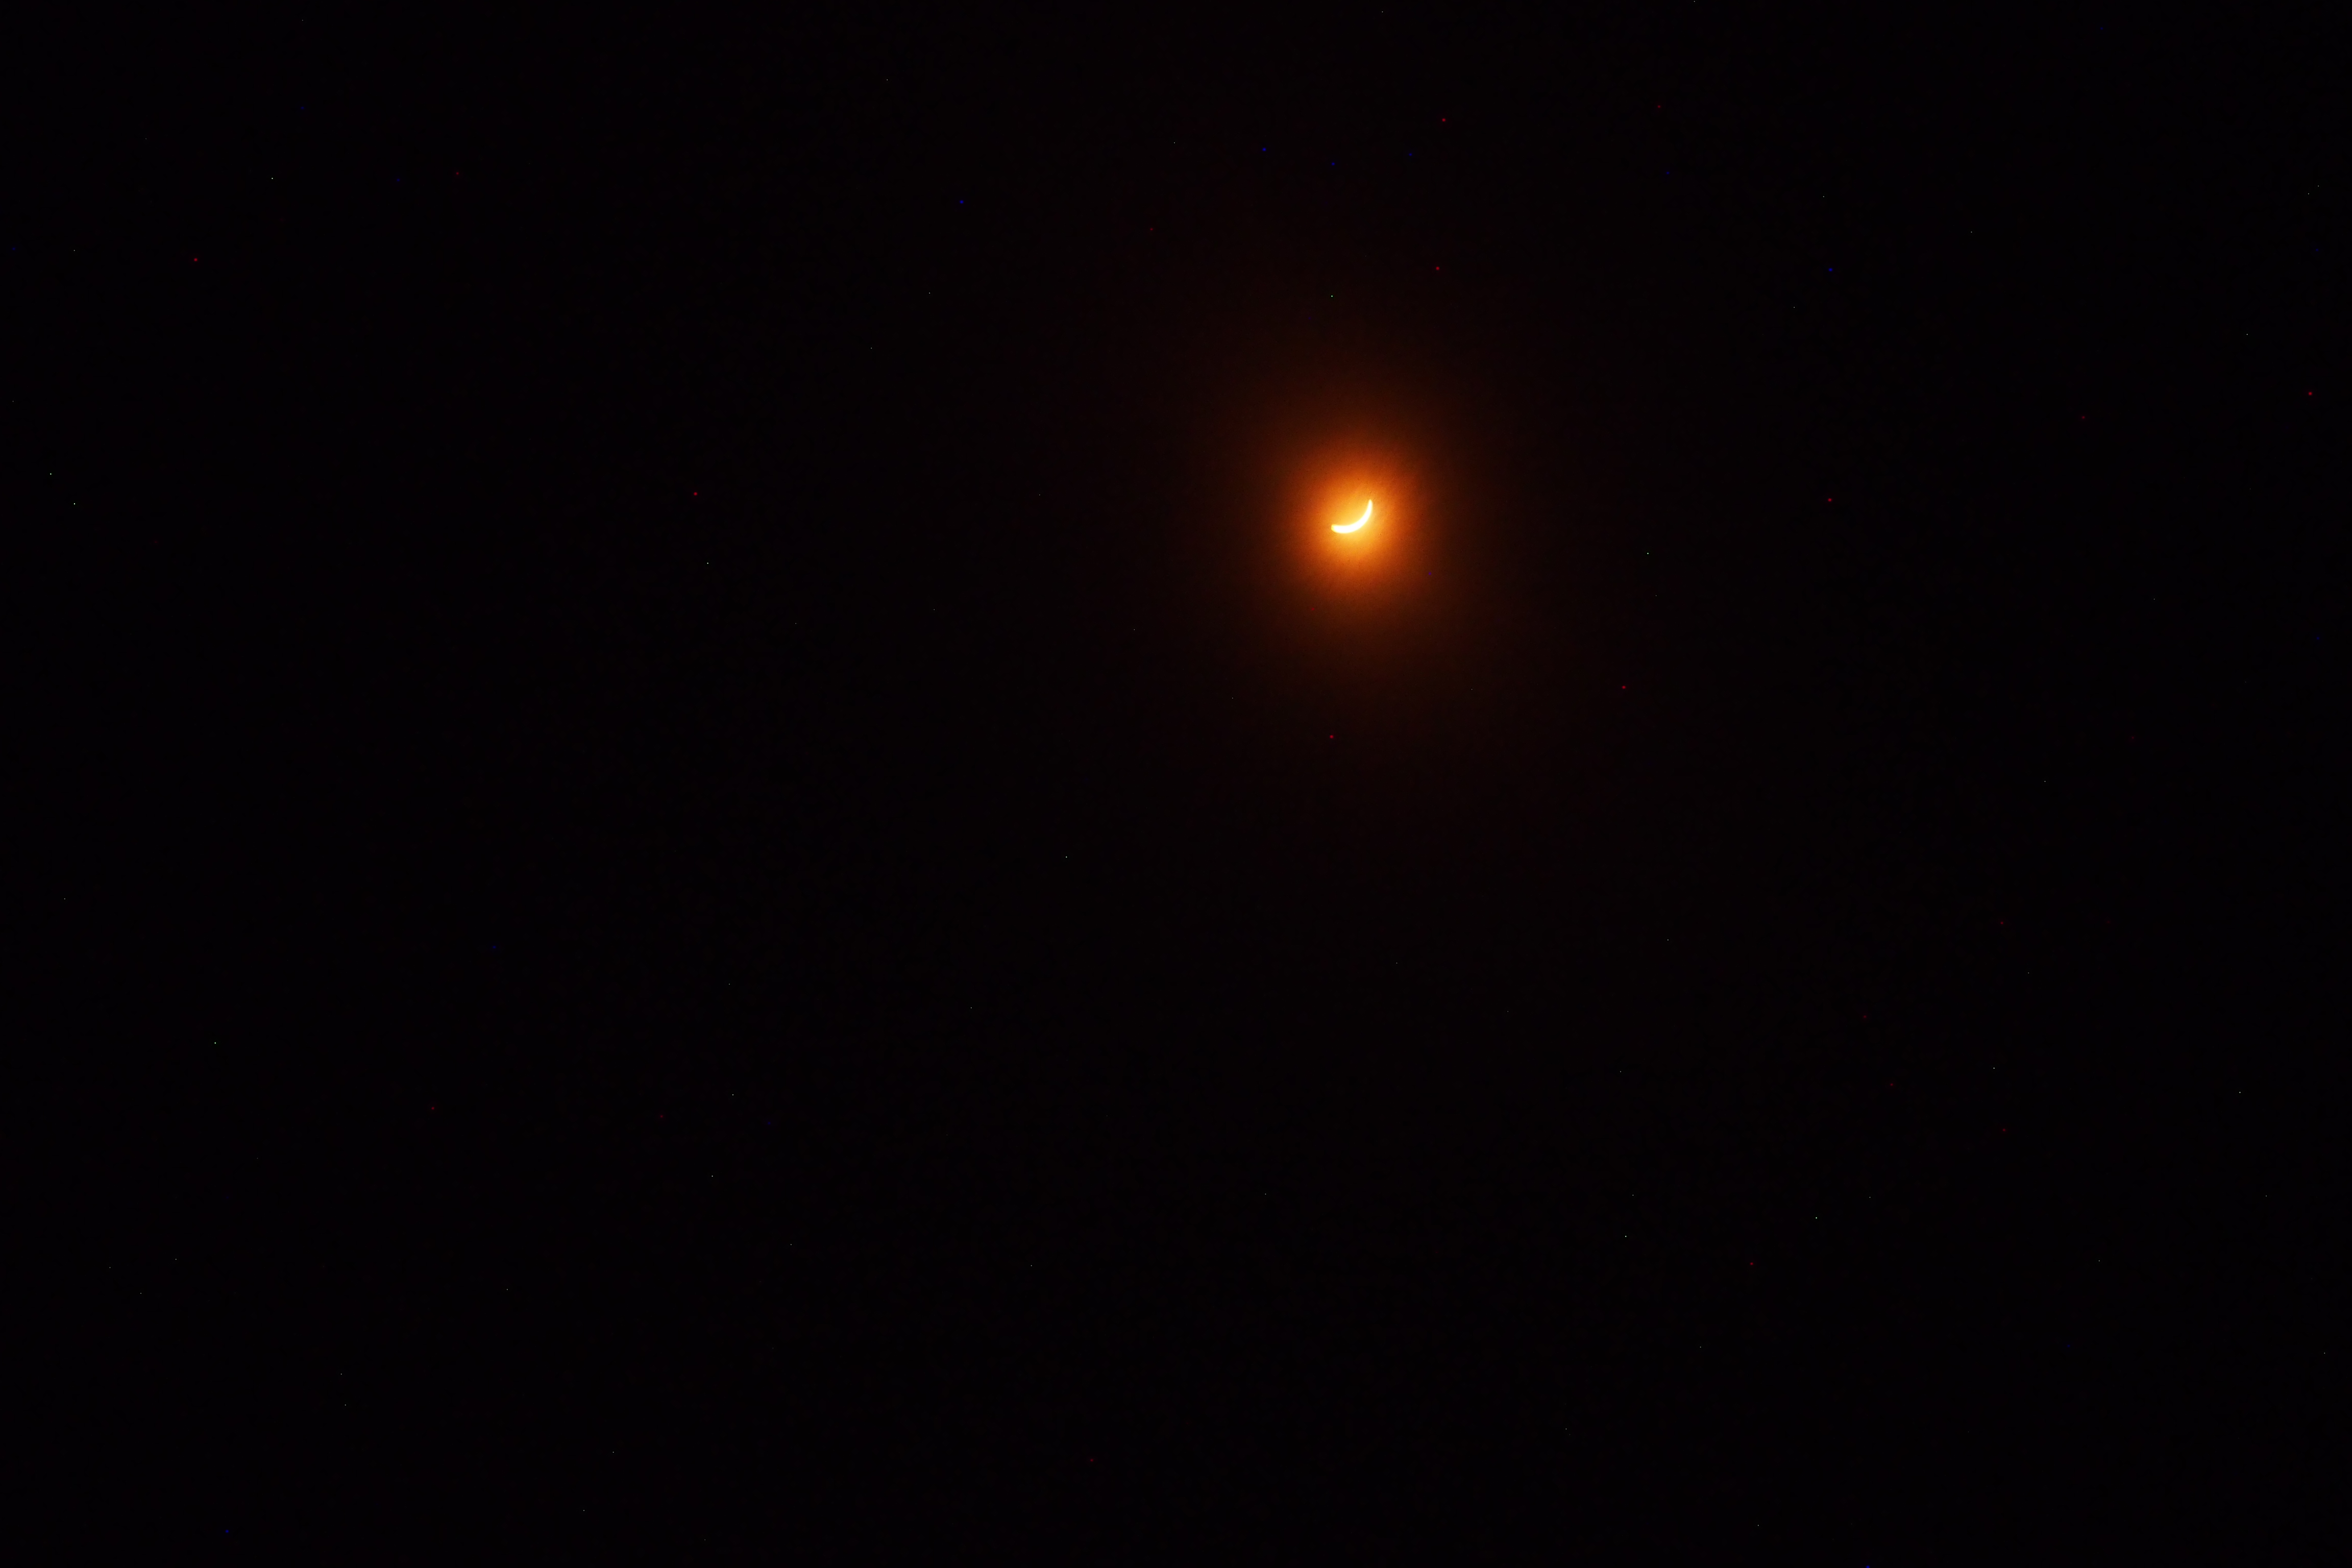
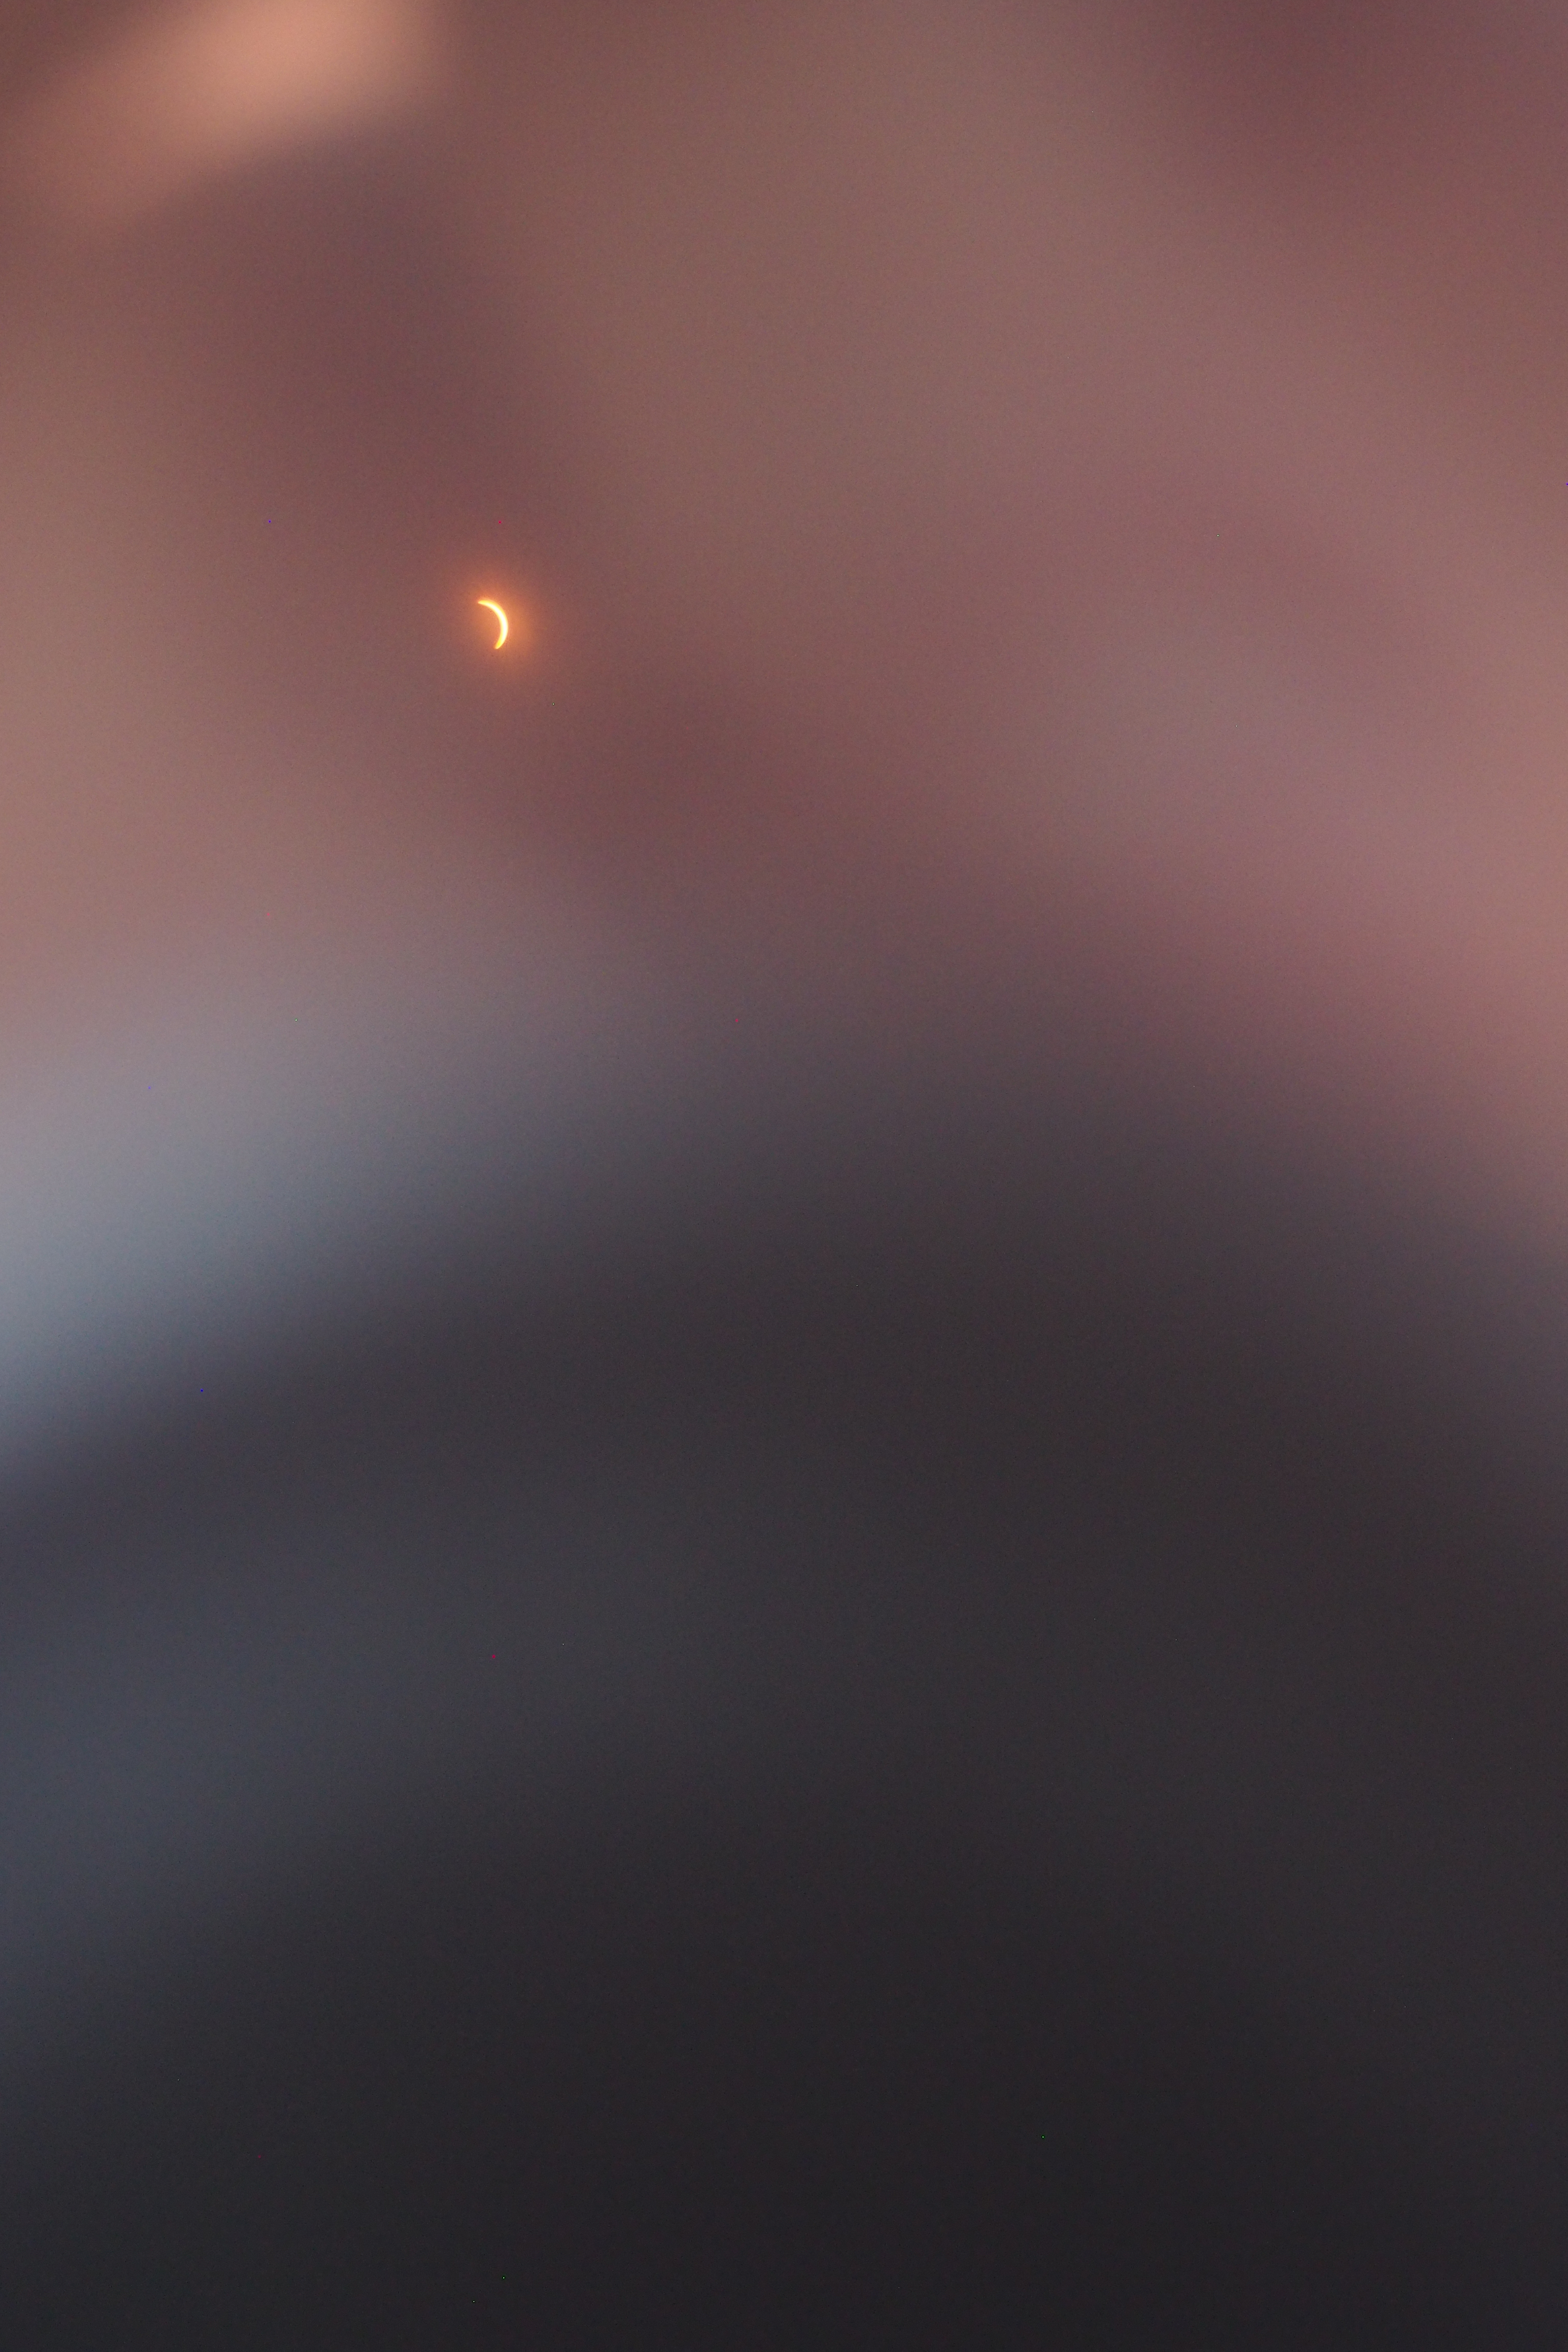
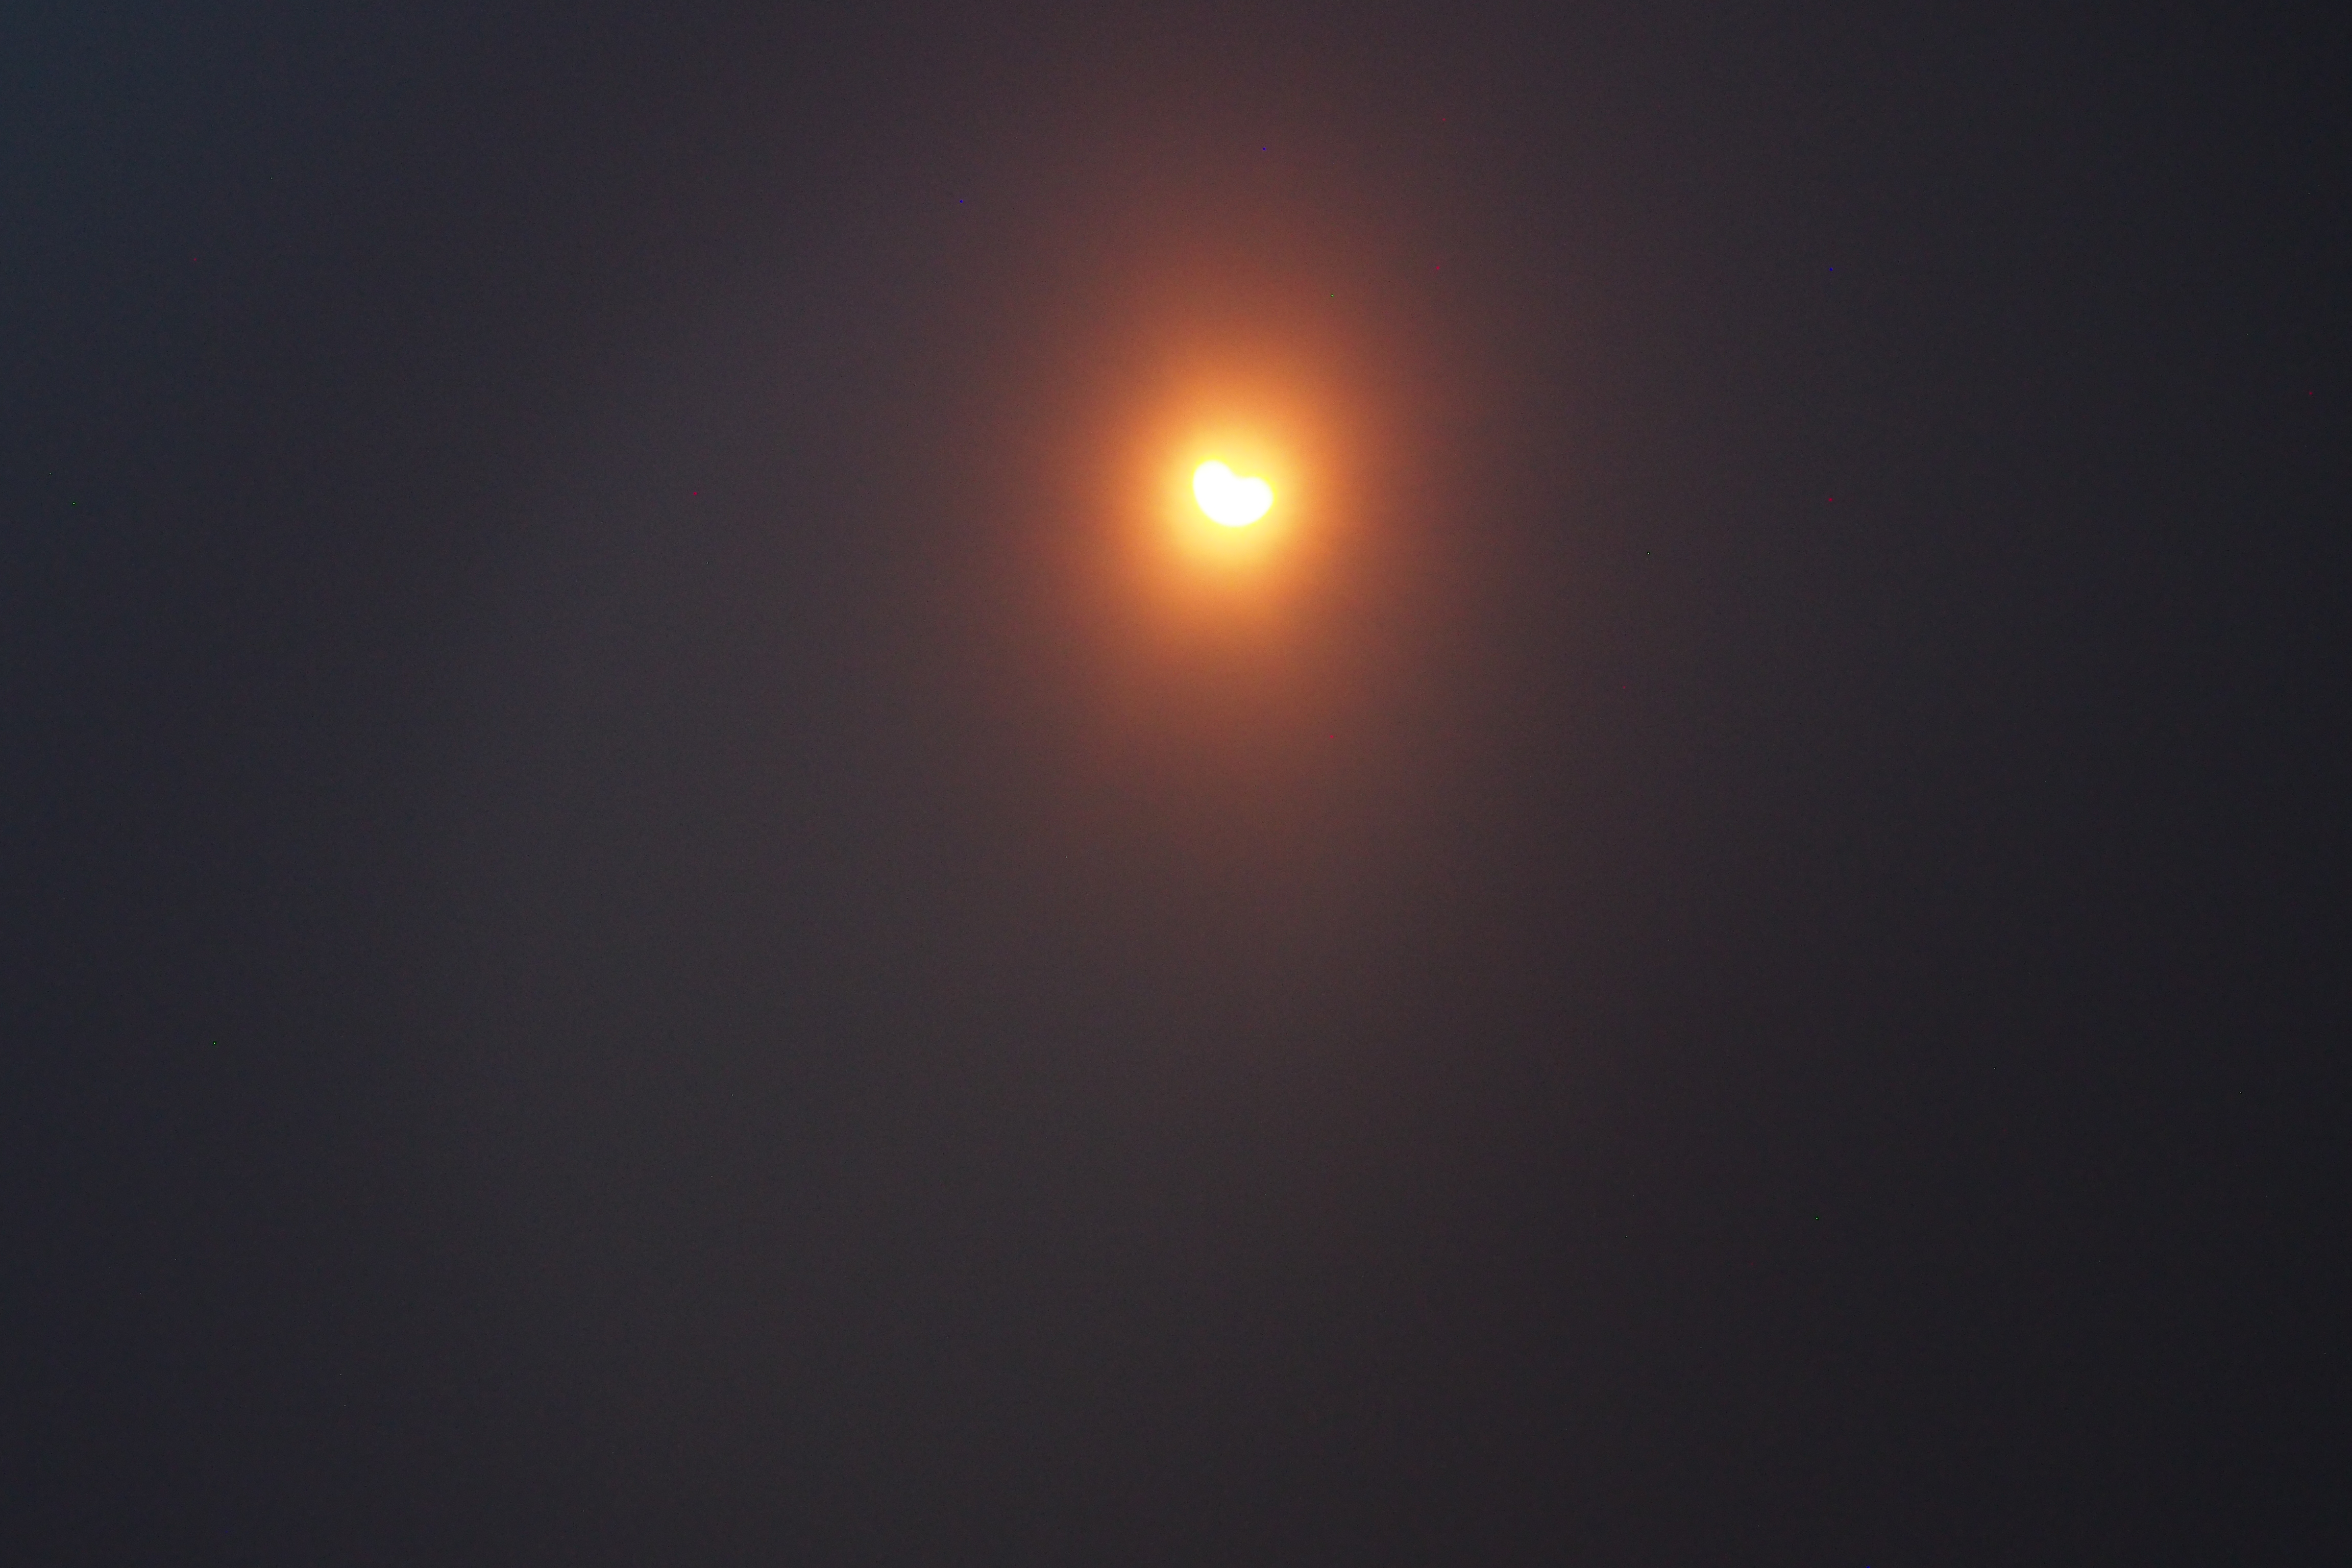
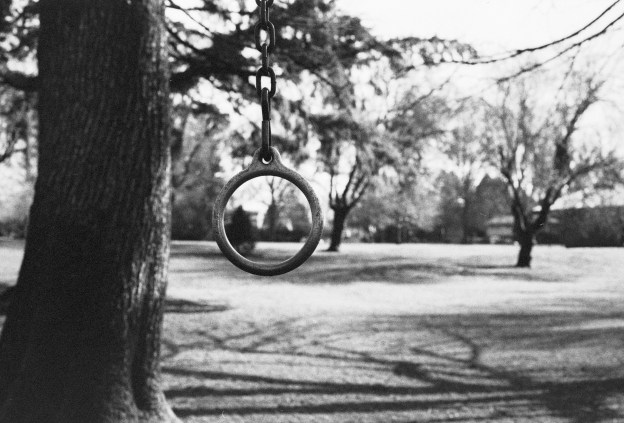
Here are some of my pictures shot with Arista EDU Ultra 200 (it’s a great and super cheap film!)

This slideshow requires JavaScript.

Uninterruptable Power Supply Modified

UPS Stands for Uninterruptable Power Supply, and as the name implies, they are uninterruptable. They are also called battery backups and are used for powering sensitive computer equipment in case of a power outage. They also regulate input voltage and protect against power surges.

Battery backups come in many different sizes between the size of a small car (for large data centers) to something that looks like an oversized power strip (for your home computer). Mine is in the middle ground between giant and small, and it is rack-mountable (that’s why it’s so flat).

This one appeared in one of my first blog posts, and it takes two 6 volt lead acid batteries wired in series for twelve volts. This is where the problems start. You can find these battery backups for free because they just have a bad battery. Why? Because the manufacturer of these power supplies will put their logo on a standard battery and sell it for 10 times as much as it cost them to buy. If you get the information off these “inspected and approved” batteries you can usually find the exact same kind for much, much less. Most people don’t know this, so they find it more economical just to get a new battery backup. For me, a new battery pack authorized by APC would run me $200. That’s not going to happen, because if I bought both batteries on it would cost less than $40 dollars.

I’m not in desperate need of a UPS, but I would like to have mine working so it’s more than just a beeping paperweight. So, I decided to go and try to fix it with stuff I had laying around. I have two 12 volt lead acid batteries that I wired in parallel, not in series. If I wired them in series, I would get 24 volts out, which would fry the control board. In parallel, it increases the battery capacity but keeps the voltage at 12. So, with this setup, I was expecting to get a longer run time than with just the regular batteries.

I was a little afraid to power it up because the batteries might damage the power supply, but after I did, the “replace battery” light didn’t come on and everything functioned as it should. I’ll need to leave it plugged in for a few days to be sure everything works, so I’ll upload a new post if there’s a battery leakage or power supply burnout.

Link

Here’s the link to all the photos from my latest film cartridge. I didn’t want to upload all the pictures to WordPress, because I would run out of storage space.  I will be doing this in the future for sharing more photos.


https://tinyurl.com/102118-photos 

Catching Up: My First Server

I created my first server in August 2018.  It’s a storage server that’s actually a desktop computer.  There are a few reasons I chose a Dell PC to one of my real rack-mount servers.

  1.  It’s Quiet: This might seem unimportant, but my other two servers sound like jet engines. I set this server up near the TV, and It’s on all day so having it be really loud would be an issue
  2. Disk Space: Although my Dell PowerEdge 2950 has many hard drives in it, it’s set up in a RAID configuration, meaning it really only makes use of one of the hard drives (read about RAID here).  My Dell PowerEdge 750 only holds one hard drive. Since this is a storage server, that wouldn’t work.  I chose this computer because it has six SATA (minus one because of the CD drive) ports.  That means I can put five hard drives in it!
  3. Automated Startup: The biggest issue with my real servers is they take lots of power and are made to be on all the time.  Most computers have an automated startup build in to the processor, but real servers don’t have that.  This computer did, meaning I could have it off at night.
  4. Floppy Disks! This computer has a floppy disk drive connector, and I like floppy disks.

The server (/computer) only had two spots to store a hard drive, so I had to squeeze them in wherever.  One is above the floppy disk drive, and one is zip-tied to the back of the computer.  It worked pretty well though.

I used task scheduler to give the computer an automated shutdown, and I also created another task that would run when the computer started up.  This task was for running a little program I wrote that would log every time the computer turned on.  The shutdown program I wrote also had a log (for shutdowns), just it was a bit more complicated because it also had to shut down the computer.

Catching Up: My Favorite Pictures from the Past Year

To catch up on the things I’ve been doing (and not posting about), I created the “Catching Up” section.  This first post will include my favorite pictures from the past year.  They were all taken with 35mm color film, and they are mostly all 200 ISO.


Plans for the Future

I haven’t posted on this blog in a very long time, and in that time many things have changed.  I gave the website a little renovation, and you may have noticed that the headers have changed to include photography and music.  Photography came from my liking of old technology because I mostly use 35mm film.  Music came from the same “old technology” hobby because I mostly collect vinyl records.  This hobby was developing during the beginning of this blog with posts about cassette decks and 100-year-old records.

So to go with the electronic posts you know, I’ll now be posting pictures and LP stuff.  This will (hopefully) mean there will be more posts on the blog.  Welcome Back!

-Owen

2017 Solar Eclipse Pictures!

First things first, I know I have not posted anything for a while, but not much has happened-and then a bunch of stuff did! I plan on making a post about restoring a vintage Apple keyboard, and trying to wash my computer keyboard (yes, with water). I also will make a post about some electronics I saved from electronic recycling, and last but definitely not least, I am getting supplies to make a post about a 386 DOS PC I got recently. Now that all the teasers are over, it’s time for the real post.

If you came here for professional photography, you came to the wrong place. But if you don’t really care, here are some pictures that we took of the eclipse while on vacation. Also, we were not in the path of totality, (we got over 99% of the sun eclipsed, though) so don’t expect pictures of the total eclipse.

So, how about some pictures!


OLYMPUS DIGITAL CAMERA

10 AM Looks Like Dusk During the Eclipse.

OLYMPUS DIGITAL CAMERA

Another Picture Showing How Dark it is During the Eclipse.

OLYMPUS DIGITAL CAMERAOLYMPUS DIGITAL CAMERAOLYMPUS DIGITAL CAMERAOLYMPUS DIGITAL CAMERAOLYMPUS DIGITAL CAMERAOLYMPUS DIGITAL CAMERAOLYMPUS DIGITAL CAMERAOLYMPUS DIGITAL CAMERAOLYMPUS DIGITAL CAMERAOLYMPUS DIGITAL CAMERAOLYMPUS DIGITAL CAMERAOLYMPUS DIGITAL CAMERAOLYMPUS DIGITAL CAMERA

Estate Sale Finds: Texas Instruments TI-99/4A Home Computer

Yet another vintage computer from an Estate Sale! This time it was the not very well-known Texas Instruments (yes, the ones that make calculators) TI-99/4A home computer. If you know anything about this computer you’ll know that the computers themselves are pretty much worthless. For some reason they just aren’t worth more that $20. But, the price of the accessories for the computer are much higher, making a whole lot of Texas Instruments stuff worth quite a bit of money. So when I went to the sale, I found that the sale managers did their research and priced everything for $95 dollars. Not a bad price for the things that came with it, but I wasn’t about to spend that much on this computer. So, for the first time I left the computer behind because tomorrow would be half-price day, meaning I could get the entire setup for a nice $47.50. I was willing to do this because I don’t think there is a very high demand for old computers. So I came back early the next day, and it was still there so I grabbed it, payed the cashier, and left the sale with way more than $47 worth of Texas Instruments computer.

Once I got home, I took everything out to see what I got. The first thing I noticed, is that the computer had no scratches or scuffs on it. It looked brand new. So did the speech synthesizer add-on, which is worth more than $47 by itself. It also came with two hard to use joysticks, a bunch of games, an extended BASIC programming cartridge, a 32k RAM add-on, and some cassette tape programs I can’t use because I would need a “Program Recorder”. And yes, the computer does work.

After using this computer system, I got really into it. I think it’s better than a lot of computers of that age. I like how it has an expansion port were you can plug in upgrades. If you wanted to upgrade the RAM on let’s say a Commodore VIC-20, you would have to use the cartridge port. That mean’t you wouldn’t be able to use any cartridge programs if you had that memory upgrade in place. With the TI-99/4A, you can use cartridges while having 2,3,4 or more expansions connected. I also like the keyboard, which is better that the ever popular Commodore 64. Another good feature is that you don’t need to turn off the computer to insert a cartridge. Lastly, it has a much better picture that my Atari 800 XL, and probably many other computers too. I would recommend it too any vintage computer collector.


P.S. An event called the “Eastmoreland Garage Sale” is coming up. It’s basically a time where a bunch of people trying to sell their stuff. There are literally blocks of garage sales, so expect me to make a blog post about things I found there!


2 Vintage Computers, 1 Estate Sale.

When I was looking for estate sales to go to this weekend, I found one that looked promising, but what I found there totally exceeded my expectations. Right when I went inside I saw a filthy Macintosh SE sitting in the corner of the garage. I was almost sure that it was broken, but I was pretty confident I could repair it (and it was a Macintosh SE!!! I never thought I’d own one!). It had no keyboard or mouse, but that was okay. Especially when the salesperson said it was $5. Then in a (also dirty) box, was an Atari 800 XL home computer. Not only did it have the computer, but it had 4 cartridge games, a data cassette deck, two manuals, a (kind of bad) joystick, and a TV switch box. The best part was the entire box was $25. I didn’t spend much more time at that sale, even though it had lots of cool stuff. I was way too happy that I had those computers.

When I got home, I put both computers on the front step and used a moist towel to wipe away all the dust and dirt before bringing them inside. The mac cleaned up nicer than I thought it would, which was good.

Later I proceeded to do a “Smoke Test”. A Smoke Test is basically when you just plug it in and hope it works and doesn’t start smoking. I was happy to see that the Atari 800 XL did turn on and worked fine. Sadly, the tape drive for the Atari was not working. It was time for the Macintosh. I was expecting to get some hard drive error on the screen, because usually the computer chips work, but the delicate moving parts of the hard drive are almost always dead (and expect to pay a lot of money for a working hard drive!). But, the unexpected happened. Not only did the Mac turn on, but it successfully booted from the hard drive!

The last thing I did was some more extensive cleaning on the computers (removing marks, scratches, etc.). I purchased a keyboard and mouse for the Mac on eBay, and might buy a new tape drive for the Atari in the future. This was probably the best Estate Sale I’ve gone to yet.